Showing posts with label bubble beads. Show all posts

Wednesday, June 6, 2012

Be Happy Now Shaker Card Kits

I’ve had people asking me to do kits for years, and for years I have resisted.  Now I am asking myself, “why”?  Honestly, I don’t know because since I’ve started making them (and since my loyal customers and beadie buds have been buying them) I’m having way too much fun! 

rainbow cropped It’s sure a heart boost to know that so many of you appreciate what I do and want to have a kit to do it too!   Ü  Thank you!!!

This next card was designed with my friend Tracy Mathia who is visiting me this week.  I love the bright colors she put together for this shaker design!  We’ve pre-stamped all the parts and the kits include everything needed except for scissors and glue.  Yep every detail is covered – even step by step instructions, micro beads and foam tape are in there!

Kits are $5 each with free shipping, and if you place an order from the website the kits are only $3 each (since you have to pay for the shipping of the beads I figure it’s a good wash.)  The easiest way to purchase kits is to email me and let me send you a Paypal request, then I can print a shipping label online and it’s super fast! 

So keep showing me the love, it makes my heart and my pocketbook feel good!  Ü

Hugs, Suzanne

Wednesday, May 30, 2012

Too Cute Room Cards

In the early days of PWA we had weekly live online classes where group members shared specific projects and “students” shared their creations from that lesson.  With up to 30 beadie buddies IMG_1790from all over the world participating at once it was wildly fun!
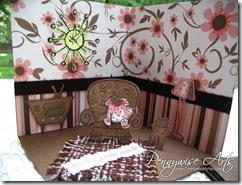
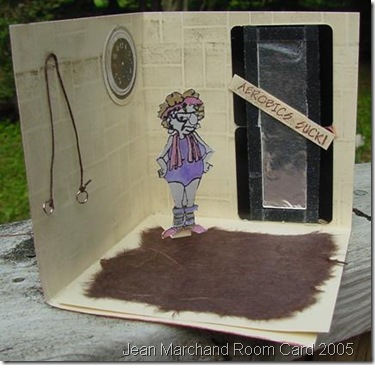
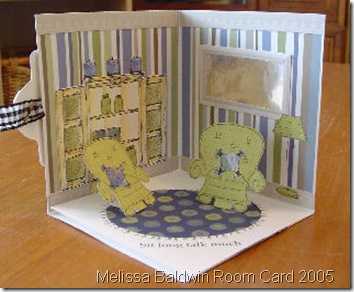
Room cards were one of the classes taught by Melissa Baldwin of  The Stamping Studio in 2005.  I thought they were so much fun that I used mine for a PWA shoebox party shortly afterwards.

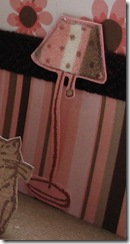
Close up details show PWA micro beads used to accent the television screen and make the lampshade shimmer.microbeadtv beaded lampshade

The retro clock hanging on the wall has bubble beads affixed to the points.

bubblebeadretroclock

A closer look from the top shows the fabric rug, kitty cat, overstuffed chair and pillows that actually look fluffy from being bent around foam tape.

IMG_1791

room I used stamps from The Stamping Studio for my decor.  The paper is from Chatterbox. 

All folded up the card is held closed by a decorative ribbon band. Stamps on the cover are CTMH and SU.

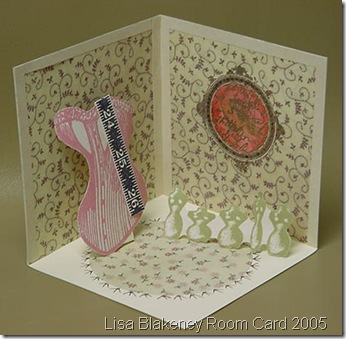
IMG_1787 Here are some of  the other cards shared in class that night with the card instructions to make your own posted at the end.

Anna Justice created a darling room with a window and decorated the outside of her card to look like the outside wall of the room!

Anna Justice 2 Anna Justice  Diane Raschal Georgia Wood Jean2  Lisa Heusler3  Marianne Colschen Melissa Baldwi Michelle McCarthy Stephanie Loomis

Room Cards
Created by Melissa Baldwin of The Stamping Studio
Melissa@thestampingstudio.com
www.TheStampingStudio.com

1. Cut your Cardstock in a perfect square. Mine is 8.5 x 8.5

2. Fold your cardstock in half. A bone folder, or the edge of
an inkpad, is a great way to get a nice crisp fold.

3. Unfold, then fold in half the other direction.  When unfolded,
your creases should look like a cross, or plus sign.

4. Now go half way up one of the fold lines, and using a craft knife
and a ruler, make a straight cut. 

5. Move your ruler over slightly (I think a "smidge is the technical term"!) And make another straight cut along side it. paper w slot

6. You should now have a thin piece of cardstock, which your can go ahead and remove by cutting off the end near the fold.

7. Fold the paper half way up.

8. Then you will fold the bottom right flap over the left flap, and
it should stand up!
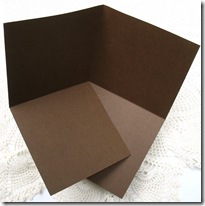
How It Folds

9. Well.... it will stand up with a little coaxing! You will need
to bend it a little so it will stand up straight. Let's call the
technical term for this "Paper Manipulation"! LOL!

10. Wala! You now have the framework done for your room card. It is the perfect size to decorate!

11.  Now feel free to decorate the inside of your room anyway you would like!… How about stamped wallpaper, molding, pictures in frames, and don’t forget the furniture! 

12. Let me tell you how to attach the furniture so it will hold
Tabsdown when you close the card; You  need cut strips of paper of varying widths for each piece of furniture you want to place in the room.  They should be the same color as the floor, and about 1 1/2 inches by 1/2 inch. You can cut them down in length as needed.

13. Fold each one in half to make a tab and place glue on one side and stick it to the backside of the furniture.

Tabs Applied

14. Then glue the other side of the tab and put  your furniture into place.

15. To close the card up for mailing, fold down the furniture, then fold up as shown.

Cover

These rooms are all just too cute!!

Hugs, Suzanne

Monday, February 6, 2012

Small Fries Treat Box

smallfry Have you seen these sweet little fry boxes that McDonald’s puts in their Happy Meals?  I don’t have a kid, and rarely eat there so it was a total novelty to me when I saw it.  So stinkin’ cute!

And then I got to thinking,……..

Wouldn’t it be cool if I could get my Cricut to cut a bunch of these out for me??  Wouldn’t they make fun party favors? And so it happened!IMG_1650

I added some bubble beads (with Sure Tac Glue) to border the top and bottom and mimic the bubbles in the paper design.  Then I cut some hearts in varying sizes with my Cricut and stamped sentiments from an ancient Close To My Heart stamp set that I have.

I found that with a heavier cardstock they really needed to be put together with O’So Sticky Tape – nothing else held them together for longer than a minute. 

I have a little craft party coming up in a few days, I think it’s time to go into production!  Ü

Oh, and if you would like to have the svg file I’m happy to share it!  (You would need to have one of the compatible computer programs to use it).  It will cut 3 boxes from a sheet of 12 by 12 paper.  Just “contact me”!

Hugs, Suzannesmallfriesinspiration

Friday, December 9, 2011

Sparkly Lighted Ornaments

Pennywise Arts is sponsoring the month of December on Gingersnap Creations and many PWA artists will be featured there.  Yesterday  on Gingersnap Creations our very own Michele Aiello-Zendejas shared some stunning beaded ornaments with an easy step by step tutorial so you can make them too!

PWAStarryNightTrio1
Supplies:

Instructions for the 3-Sided (Triangle) Ornament:

PWAStarryNightTrio3Slide
1. Cut out the three images that you want to use from the Swing Shift Designs Christmas Slide Soup Collage Sheet, Designed by Michele Aiello-Zendejas exclusively for Pennywise Arts. I used the two of the Three Kings slides and the Star of Bethlehem for this ornament.
2. Adhere the slides to the back of the images. Note: You won't see the slides, they are used for support only. You could use chipboard or very heavy cardstock instead of slides for the 3-sided slide ornament, but not for the 4- or 5-sided slide ornament. The 4- and 5-slide ornaments are lighted, so the support has to be transparent.
3. Peel one side of the backing off of a sheet/piece of O'So Sticky Tape. Lay the three slides face down onto the exposed adhesive. Leave a very small space, 2mm or the thickness of your slides, between the slides so you can fold the sheet with the microscope slides stuck to it into a triangle shape later.
4. The three slides are now held together by the O'So Sticky tape that you added in step 3. Trim the excess tape off around the outer slides. DO NOT cut between the three slides or separate them.
5. Peel off the rest of the backing, then dip the front side of the attached slides into a 50/50 mixture of Pennywise Arts Ultra Fine Micro Beads and Pennywise Arts Mini Micro Beads.
6. Place a piece of single side heavy duty tape on the back along one side of the attached slides and then carefully fold the three slides into a triangle shape. Use a chopstick to reach inside of the triangle and press the tape onto the back of the slides to secure them.
7. Run a piece 1/4” width piece of O'So Sticky Tape around the top and bottom of the ornament. Remove the protective liner and then dip it into the PWA bubble beads and then into a 50/50 mixture of PWA's Ultra Fine Micro Beads and PWA's Mini Micro Beads.
8. Attach 1 piece of 3” long wire to the inside (approximated ¼ to 1/2” in) at the top and bottom of each slide with hot glue.
9. Gather the three wires on the bottom and slide the beads on from large to small. Then bend the excess wire into a curl or scroll. Gather the three wires at the top and slide the beads on from large to small. Twist the wires together and bend into a loop. Add a hook and hang it on your tree!

Instructions for the 4-Sided (Quadrilateral/Square) Lighted Ornament:
PWAStarryNightTrio4Slide

1. Cut out the four images that you want to use from the Swing Shift Designs Christmas Slide Soup Collage Sheet, Designed by Michele Aiello-Zendejas exclusively for Pennywise Arts. I used all three of the Three Kings slide images and the Star of Bethlehem slide image for this ornament.
2. Adhere the microscope slides to the back of the images with O'So Sticky Tape.
3. Adhere O'So Sticky Tape to the front of each image. Remove the protective liner and then dip it into a 50/50 mixture of PWA's Ultra Fine Micro Beads and PWA's Mini Micro Beads.
4. Cut a hole out of the center of a small square Shake It Shaker Card Window large enough for the Battery Operated Tea Light Candle to fit through. This will be the base.
5. Measure around the Battery Operated Tea Light Candle, then add ¼ to 1/2” for overlap. Cut a piece of Transparent Film to the length you just measured by 3” tall. Roll it into a tube and secure with clear tape. It should fit easily around the Battery Operated Tea Light Candle. Attach the clear tube to the bottom Shake It square with clear tape. Insert the Battery Operated Tea Light Candle from the hole in the bottom and secure it with clear removable tape. Do not glue it in. You want to be able to remove it so you can change it out when the battery goes dead.
6. Apply O'So Sticky Tape to the top part of the base piece. Remove the liner. Place a 1/4” strip of O'So Sticky Tape down the center of each slide. Remove the protective liner from the tape and attach the four image slides evenly spaced around the clear tube. The slides should now be connected to the tube and to the base, one on each side of the base.
7. Use another small square Shake It Shaker Card Window for the top of this project. Secure it to the top of the four image slides with thin strips of O'So Sticky Tape.
8. Cover the top Shake It Shaker Card Window with O'So Sticky Tape. Remove the liner to expose the tape.
9. Add some beads, small to large, onto a head pin. Bend and trim the excess wire from the head pin and then attach it to the top of the project. It should be centered on top of the Shake It Shaker Card Window.
10. Attach four acrylic flowers to the base, and four flowers around the beaded head pin on the top of the project.
11. Dip the exposed tape on the top and base into the PWA bubble beads and then into a 50/50 mixture of PWA's Ultra Fine Micro Beads and PWA's Mini Micro Beads.

Instructions for the 5-Sided (Pentagon) Lighted Ornament:

PWAStarryNightTrio5Slide 

1. Cut out the five images that you want to use from the Swing Shift Designs Christmas Slide Soup Collage Sheet, Designed by Michele Aiello-Zendejas exclusively for Pennywise Arts. I used all three of the Three Kings slide images and two of the Star of Bethlehem slide images for this ornament. Set one Star of Bethlehem slide images aside. Punch a few tiny stars out of each of The Kings slides and one of the Star of Bethlehem Slides, then punch out a few 1/16” circles in all five slides. Now punch a small star out of the center of of the Star of Bethlehem slide image that you set aside. Punch out a few 1/16” circles from this slide as well.
2. Adhere the microscope slides to the back of the images using O'So Sticky Tape. Note: The microscope slides are used for support. The 5 sided slide ornament is lighted, so the support has to be transparent.
3. Peel one side of the backing off of a sheet/piece of O'So Sticky Tape. Lay the five microscope slides face down onto the exposed adhesive. Leave a very small space, 2mm or the thickness of your microscope slides, between the microscope slides so you can fold the sheet with the microscope slides stuck to it into a pentagon shape later.
4. The five microscope slides are now held together by the O'So Sticky tape that you added in step 3. Trim the excess tape off around the outer microscope slides. DO NOT cut between the five microscope slides or separate them.
5. Peel off the rest of the backing, then dip the front side of the attached microscope slides into a 50/50 mixture of Pennywise Arts Ultra Fine Micro Beads and Pennywise Arts Mini Micro Beads.
6. Place a piece of single side heavy duty tape on the back along one side of the attached microscope slides and then carefully fold the five microscope slides into a pentagon shape. Use a chopstick to reach inside of the pentagon and press the tape onto the back of the adjoining microscope slide to secure it.
7. Punch or cut a 2” circle (or larger, depending on the thickness of your microscope slides) from the Clear Transparent Film. Use the 5 sided ornament as a template and place a dot where the 5 corners meet, all the way around the circle.
8. Cover both sides of the 2” circle with O'So Sticky Tape. Punch a 1/16” inch hole into the center of the circle. Thread a head pin through the hole you just punched. Place a small piece of tape on the head of the head pin to secure it to the circle. Remove the bottom layer of protective backing from the tape and adhere the circle to the top of the 5 sided ornament, fold the tape down onto the sides of the ornament.
9. Remove the protective liner from the tape. Thread the faceted beads, from large to small, onto the head pin. Bend the head pin into a hook shape. Place 5 acrylic flowers around the newly beaded head pin. Then dip it into the PWA bubble beads and then into a 50/50 mixture of PWA's Ultra Fine Micro Beads and PWA's Mini Micro Beads.
10. Run a piece 1/4” width piece of O'So Sticky Tape around the top and bottom of the ornament. Remove the protective liner and then dip it into the PWA bubble beads and then into a 50/50 mixture of PWA's Ultra Fine Micro Beads and PWA's Mini Micro Beads.
11. Place a Battery-Operated Tea Light Candle inside the bottom of the ornament. The battery should fit snugly. If your battery operated candle falls out, use a few small pieces of clear transparent film as a shim to keep it inside the ornament. Do not glue it in. You want to be able to remove it so you can change it out when the battery goes dead.

PWAStarryNightTrio5SlideLightsOn
Reminder: never leave anything producing heat unattended.
Thanks Michele for sharing your amazing talent and inspiring us with your creative ideas!

Hugs, Suzanne

Thursday, April 28, 2011

Will Spring Ever Get Here?

I keep waiting for spring to show up to share this beautiful daisy box from PWA designer Michelle McCarthy.  Now I think maybe DSCF4415Spring is just waiting for me to share it so it can show up!

I’ll let Michelle tell you about it in her own words.


“Here's a simple box I put together using a mix of Green, Black and Gold micro beads and the new Iridescent Bubble Beads.”  


DSCF4414

I started with a dollar store find of two boxes with two drawers each and glued them together to form the four drawer box.  After adding the varied papers and a tiny bit of stamping, I edged all the side edges of the box with the mix of beads.  For the drawer faces, I just glued ribbon down  on paper and then cut to size of the drawer front.  Bubble beads for the centers of the daisies were tacked down with Crystal Effects.  I added a couple silk daisies and a ribbon and called it good.

 DSCF4415 DSCF4420

Michelle, I should say “good” is better than good here!  Thanks for the great contribution this month!

DSCF4421 DSCF4422 DSCF4423 DSCF4424

Wednesday, March 16, 2011

A Frosted Spring

When I look at this elegantly beaded card by PWA Designer Christine Grabb it takes my breath away. 

white floral

Done all in white using a Nestabilities die and hand held punches Christine created each of the elements for this stunning card.

O’so Sticky Tape and Ultra Fine Micro Beads frame the scene of grass, butterflies and flowers.  Our Iridescent Bubble Beads are the perfect accent for the finishing touch.

Wednesday, December 1, 2010

Thanks For Giving

Slide Mailer From Evelyn Spikes

  It’s post Thanksgiving and I’m still giving thanks for all of the wonderful women who are a part of my life.  Pennywise Arts (and all of the creative ladies who have supported it) has been quite a surprise.  We never expected the business to last past the first year yet, here we are perched on the verge of year 8!  Wow!

The Pennywise Arts Yahoo Group has been a huge blessing.  Who knew that so many friendships could be forged among otherwise strangers?  The bonds of care, support and inspiration that have blossomed from our community amaze me every day. 

One of my long time friends from the group is Evelyn Spikes.  Evelyn is an amazing artist who inspires me to just get in there and “make art”.  She’s on several design teams (including ours) and she never shies away from a challenge.  When I retire, I hope I can be as busy, active and creative as Evelyn!  Ü

One of her gorgeous creations blessed my mailbox this week and I could hardly wait to share it with you:

Slide Mailer From Evelyn Spikes

The base is an item I instantly recognized.  Several years ago we sold “slide mailers” on the Pennywise website along with glass microscope slides.  I’m sure Evelyn had this in her stash from then and I was tickled to see her make use of it in such an elegant way.  I really love how the bubble beads add sparkle and subtle color.  It’s the perfect accent for a wonderful piece of art that I am happy to have!  Thanks so much Evelyn! 

Hugs,  Suzanne

Friday, September 3, 2010

Clipboard Minis

A couple of years ago I saw these darling little mini clipboards for sale on eBay.  I purchased a dozen and then forgot I had them until Marianne’s design team package arrived! 

IMG_0266

These tiny little guys only measure about 2” by 3” (that’s my best estimate without getting up from my seat to actually go measure).  The clips actually work and they have a cute little ball chain attached for adding to other things.  hmmmmm…… the wheels of my brain are turning,…. wouldn’t that be a fun thing to add to a fat book!?

Marianne sent some blank ones too – and I’ve added them to the treasure box of prizes that we’ll be awarding on our next blog hop!

Tuesday, August 31, 2010

Thank You For Being A Friend

Marianne Colschen has been my friend since the early, early days of Pennywise.  She is an amazing support to our creative endeavors and has worked many conventions by my side.  I appreciate her for her kindness, her friendship, her creativity and her fearless rattle snake skinnin’ heart!  (You’ll have to ask her about that story sometime….)   Ü

IMG_0263

Thanks for being such a good friend Marianne, and for making this bubble beaded card for the blog too!  Ü

Suzanne and MarianneMarianne and me at ARTS 2004

Tuesday, August 17, 2010

Bubbly

PWA designer Becky Ward has added a lot of great texture to this “bubbly” card!

IMG_0260

Three layers of cardstock, a Cuttlebugged background, three dimensional popped up flower, ribbon and Pennywise Bubble Beads all come together to create an astonishing card that has to be fondled to be fully appreciated!  Ü

Hello Bubble Beads!

We are pleased to show off this bright and beautiful card by Marianne Colschen!  The pink, yellow and orange colors of this creation are hot, hot, hot!

IMG_0142 

Marianne used our new Iridescent Bubble Beads to accent the centers of her flowers and they add so much texture and shine!  Do you love it as much as I do?? 

Tuesday, August 3, 2010

Bubble Beaded!

Marianne Notebook

Marianne Colschen has been a busy, busy beader finding all kinds of fun and unique ways to incorporate our newest Iridescent Bubble Beads into her art! 

This darling notebook is small enough to tuck into a purse and stylish enough to make you want to actually write important things down in it!  Ü

BONUS!  This week one lucky customer will find this bead-i-ful beauty tucked into their order envelope!  All orders placed between Tuesday August 3rd and Saturday August 7th will be assigned a number in numerical order of receipt.  A predetermined “secret number” has already been assigned as the winner and if you happen to be “that” order number then you win!  We hope the winner will post a comment back to this page too – cause it’s always fun to hear from excited customers!

We look forward to sharing more of Marianne’s art with you all month long so keep coming back!

Hugs,

Suzanne

Oh –and go place your orders!  www.PennywiseArts.com !!

Sunday, August 1, 2010

More Dollar Store Art

The gals in our Yahoo community are really taking up the challenge and creating great art from things that cost only one dollar!  You go girls!  I love all of the ideas and inspirations!

Laura Davis was first to share and her altered dollar store book is gorgeous!

Laura'sVictorianSpread

Michele Aiello Zendejas needed a thank you gift so she created these stunning notepads! 

Be sure to visit Michele’s blog to see lots more of her artwork!
http://www.atozdesigns.com/maz/

Evelyn Spikes made a special trip to the dollar store in search of things to play in our challenge and here is what she found:

Dollar Tree Finds

I was most intrigued by the candle holder in the back and I love what Evelyn did with it!


tealight evelyn 1000x740 

Look close up!  The bubble beads really add a layer of dimension!  And I imagine when the candle is lit that there could be some fun light play on them as well.

evelyncloseupcrop

The little white pails have been transformed! Dollar Tree mini pails crop

A close up view shows how Evelyn added the bubble beads to this project too:

mini pails closeup crop

Evelyn has a very active blog with lots of her other art postings!  http://www.beyondjustblackandwhite.blogspot.com

I dug up several things that were done in the past to share as well.


Annette Lanker got me totally addicted to these fun frames from the dollar store!Dollar Store Frame

Annette filled in the circles with a clear drying glue and added different colored (opaque) micro beads to each section.  Inside she put a sheet of O’So Sticky Tape and added a neat mosaic element to the tape before applying more coordinating micro beads:

Annette Lanker

Once upon a time a group of beadie buds took a day trip to Alaska for a shoebox party and oh what fun we had!  I wanted a special frame to commemorate that trip of a lifetime so I used Annette’s technique:

Suzanne Glazier

And here is another frame that I embellished for a swap I participated in:

 3 Frame   My 3 Frame

All three frames were painted over with white acrylic paint that was then colored with alcohol inks.

I love to show close up pictures so you can really see the detail better.  The suns were made using alcohol ink on flat glass pebbles glued to wire that had been curled.  There is a layer of clear embossed sun stamping on the frame that is really only visible in the upper left corner of this photo:

Sun

The surf frame was embossed with O’so Sticky Powder, micro beads and fru fru flakes.  It’s my favorite of the three!

Surf

The big embossed seashells don’t show well in this photo of the sand frame but there are there.  Over that I made a thick squiggle of Sure Tac Glue (it dries clear and I love it!)  I place the shells where I wanted them and then grouted the rest of the exposed glue with micro beads.  When it was dry I went over it with a bottle of alcohol ink, squeezing the color right from the bottle over the shells and beads.  I love how many of the shells natural colors and textures still showed so well after inking them brown!

Sand   

If you’re read this far you must be a dollar store addict and art junkie too!  Send me photos of your creations and I’ll share them here!   Email: suzanne@pennywisearts.com