Wednesday, December 22, 2010

Gift Card Holders

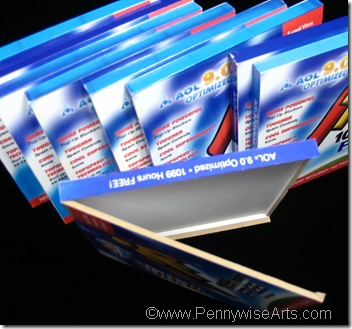
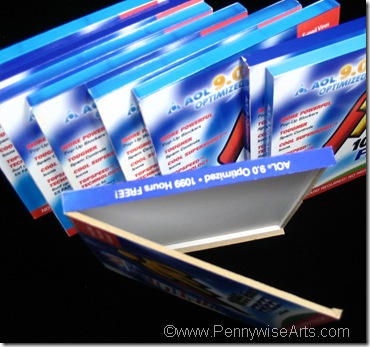
If you follow the Pennywise blog regularly you might recall these AOL cd boxes that were in desperate need of alteration:

aol boxes I’d collected a substantial amount of them years ago when they could be found on the counter at the post office free for the taking (and taking, and taking).  Even just two at a time, they added up quickly when you consider that back then I went to the post office five days a week.  Best of all, these very unique boxes are made of WOOD!

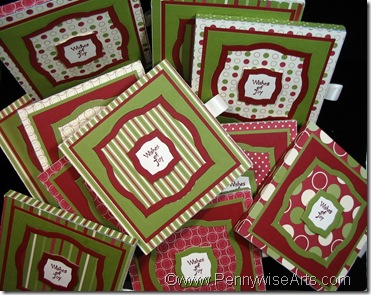
On the first weekend of December, I sat down with four Stampin’ Up paper packs, Sure Tac Glue and 28 AOL boxes.  I was determined to have my project as close to completed as possible before the weekend slipped by.

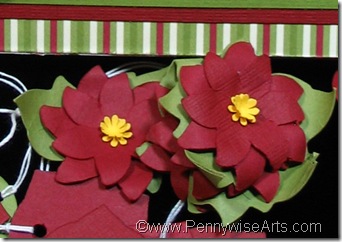
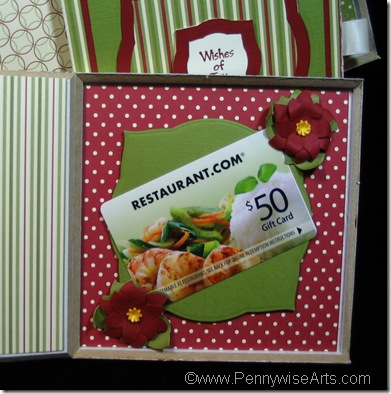
gift card boxes I’m proud to say that I attained my goal and even got a head start on the handmade poinsettia flowers to embellish each one.  (Jolee’s eat your heart out!) 

Poinsettas With a little help from my friend Chriss Grabb, the flowers were finished during several episodes of “White Collar”. Ü

The boxes are even finished on the inside!  (Spellbinders dies made them look so professional!)

Inside Gift Card Boxes

All I had left to do was make the  tags and add the gift cards!  I chose Restaurant.com cards to show my appreciation to the Pennywise Arts Design Team.  I got a great discount on them and I think it’s fun to go hunting for deals at restaurants we haven’t tried yet!  Design Team members, be sure to read the instructions on the back of the card!

Thanks everyone for your input, ideas and feedback.  I look forward to a prosperous 2011 and hope you’ll be right there with me!

Hugs,  Suzanne

Thursday, December 16, 2010

Countin Down The Days

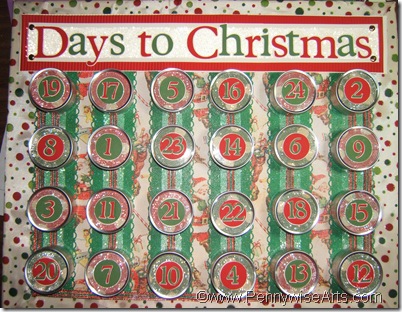
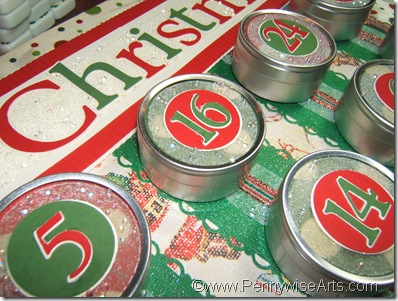
DSCF4227Children all over the world are counting down the days til Santa comes and Michelle McCathy’s grandson Evan is no exception!  His grandma made him an advent calendar with micro bead pizzaz!

Each tin has been beaded and numbered and leave it to Michelle to mix them up all up to make little Evan learn his numbers!  Ü    DSCF4231I’m sure that this lucky kid is having a blast discovering each of the treasures inside!

Hugs,  Suzanne

Monday, December 13, 2010

Tag Time

Do you need some simple ideas to get handmade tags done in time for gift giving? You're in the right place! Today we have some cute tags by some very talented ladies!

Cheryl Miller created the tree tag at left and Jean Sunderman this one below:


Here is a really neat calendar tag that Michele A-Z made. It's the gift that gives all year long! This idea could even be multi purposed as a gift tag on a present!


Do you have a Christmas ornament or tag that you'd be willing to share? Send it to me! suzanne@pennywisearts.com


Hugs and Happy Holidays!
Suzanne

Sunday, December 12, 2010

Another Dose of Ornament Inspiration

I am so amazed by the plethora of things that have been shared by my Beadie Buds over the years! The website Art Gallery is just a sampling. I wish that I could just magically upload all of the many photos and tutorials that have been created by our Yahoo group members.

Here is a bottle cap bracelet created by Evelyn Spikes that totally inspires me:

Wouldn't our Christmas collage sheets look neat framed in the windows with ultra fine micro beads over them?


And here is an elegant ornament created by Julie Shaefer (daughter of Beadie Bud Francine Domshine-Hill):


The next post will have some wonderful ways to use tags in your Christmas preparations so stay tuned!

Hugs and Happy Holidays,
Suzanne

Saturday, December 11, 2010

More Holiday Ornament Inspirations

On page two of the Pennywise Arts website Art Gallery Stephanie Loomis has some elegant dominoes. Snowflakes are always quick and easy and I love how she has oriented one sideways!
We also have some purse charms (not sure who made them though).

I love the idea of doing some tag ornaments using the ball chain as a hanger. I always save the little chains thats sometimes come on clothing tags (usually my son's jeans) and this would be a neat wayto use/recycle them!
Hugs and Happy Holidays,
Suzanne

Friday, December 10, 2010

Holiday Ornament Ideas

With some unexpected time on my hands I thought I would comb all of our archives and art gallery to find some beadie ornament ideas for you! We sure have some great ones in the Pennywise Arts website Art Gallery

Not all of the ideas that are inspiring me are "Christmas" themed but I can sure see some potential in making them so!

At left are glass slide ornaments made by Cheryl Miller.
I would really love to make Yvonne's shaker box into an ornament! Can you see it in your mind's eye too?

Yvonne also has some cute ornaments which she constructed with coin holders as picture windows:

Beth Ullman has some darling pins:


And that's all on page one of our art gallery!

Hugs and Happy Holidays,
Suzanne

Friday, December 3, 2010

Cards In A Tin

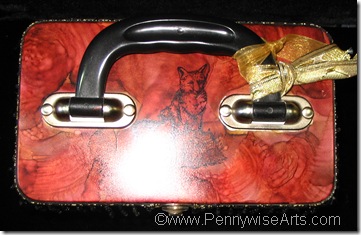
Great tin containers can be found most anywhere and with a little imagination, they can take on a look completely different than when you saw them first.

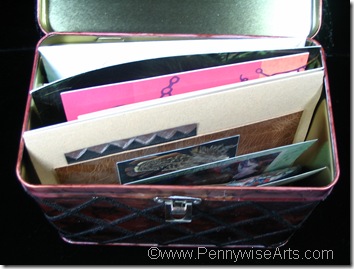
Michelle McCarthy altered this tin with alcohol inks, rubber stamped images, micro beads and beaded trim. 

IMG_0577IMG_0581  

Inside she can store cards to send, or the whole combination can be given away as a gift.

IMG_0579

I know more than a few people who would love to get a tin of handmade cards as a gift!

Hugs, Suzanne

Wednesday, December 1, 2010

Thanks For Giving

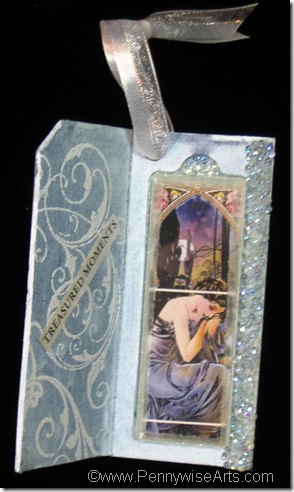
Slide Mailer From Evelyn Spikes

  It’s post Thanksgiving and I’m still giving thanks for all of the wonderful women who are a part of my life.  Pennywise Arts (and all of the creative ladies who have supported it) has been quite a surprise.  We never expected the business to last past the first year yet, here we are perched on the verge of year 8!  Wow!

The Pennywise Arts Yahoo Group has been a huge blessing.  Who knew that so many friendships could be forged among otherwise strangers?  The bonds of care, support and inspiration that have blossomed from our community amaze me every day. 

One of my long time friends from the group is Evelyn Spikes.  Evelyn is an amazing artist who inspires me to just get in there and “make art”.  She’s on several design teams (including ours) and she never shies away from a challenge.  When I retire, I hope I can be as busy, active and creative as Evelyn!  Ü

One of her gorgeous creations blessed my mailbox this week and I could hardly wait to share it with you:

Slide Mailer From Evelyn Spikes

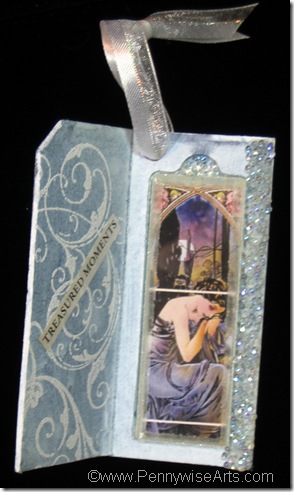
The base is an item I instantly recognized.  Several years ago we sold “slide mailers” on the Pennywise website along with glass microscope slides.  I’m sure Evelyn had this in her stash from then and I was tickled to see her make use of it in such an elegant way.  I really love how the bubble beads add sparkle and subtle color.  It’s the perfect accent for a wonderful piece of art that I am happy to have!  Thanks so much Evelyn! 

Hugs,  Suzanne

Monday, November 29, 2010

Name Frame

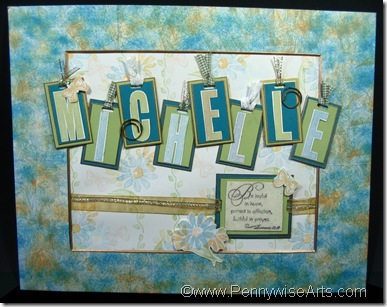
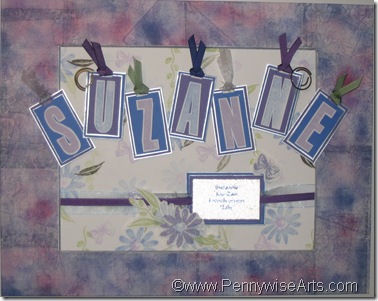
Here’s a great gift idea from PWA designer Michelle McCarthy!  Michelle created this lovely name frame from ink, paper, ribbon, circle clips and of course micro beads applied with O’So Sticky Tape.Name Frame

I was lucky enough to get to make one with her at a shoebox party in California several years ago.  IMG_0629

I wanted to show close ups but the lighting won’t cooperate today to get good ones.  Here are a couple of not so good ones:

IMG_0636  IMG_0634

If you have or make one of these fun frames, please send me a photo so I can share it here!

Hugs,  Suzanne


Stamp Credits:  Stampin Up!

Friday, November 26, 2010

I Feel An Idea Coming On

As you know I’ve been mulling over how to make gift card holders this year.  Then I remembered that I have several (okay, a LOT) of these old AOL boxes.  Years ago they were free for the taking at the post office and boy did I ever take advantage of that!  LOL!!

aol boxes They are a really nice wooden box with a white liner inside.

I’m thinking gesso on the outside…. and then some decorative paper for a start……

What should I do after that??  Ü


Hugs,  Suzanne

Thursday, November 25, 2010

Candy Jars A’la Jenn

PWA Designer Jennifer Toussaint’s candy jars are a big hit on the PWA Yahoo Group!  She even had a raffle and made one especially for Julie Imsland, another member of our group.

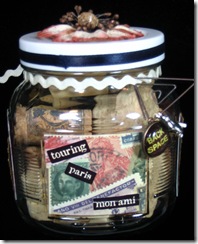
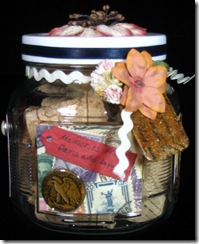
Julies Jar2 Julies Jar

Wouldn’t this be a great Christmas gift idea for co workers, the mailman, paper boy, etc….  people that you’d like to give a little something to that doesn’t cost a whole lot.  Um, yes!

Here’s a link to the jar that Jenn made for me last summer!

http://pennywisearts.blogspot.com/search?updated-max=2010-07-27T02:55:00-07:00&max-results=7

Wednesday, November 24, 2010

Don't forget that Pennywise Arts offers gift certificates!

We have gift certificates available in several different denominations - from $10 to $100 and many in between.

Help Santa get you exactly what you want for Christmas by sending him a link to the gift certificate page of our website!

P.S. These can be used on ANYTHING we offer - including the annual PWA retreat in the spring!! Yeee Haw!! Ü

Happy Thanksgiving

Happy-Thanksgiving

As Thanksgiving day approaches, I wanted to take a moment to express my thanks and gratitude to all of the people in my life who have blessed me, supported me, believed in me and contributed to my success. 

I couldn’t have done any of this without you all!

Tuesday, November 23, 2010

PWA Rainbow Friday

Rainbow Friday

PWA Members ALERT!!

Stop by our Yahoo Group on Friday, November 26th (and all weekend long) for some great deals, finds and fun stuff!  (Or at least stop in and say hello so I won’t be lonely!)

It won’t be long before inventory time and we don’t want to count all this stuff!

NEW Stampers Anonymous Rubber Stamps  - limited selection all $15% off retail prices

Lots of unmounteds – some used and some new – just $1 each SET!

Miscellaneous AWESOME stuff from Suzanne’s Craft Room Clutter.  (I’m reducing everything by 1/3 to make room for more friends to come play!)

Punches and die cutting systems, dies and more!

Hope you’ll stop in!

Hugs, Suzanne

Monday, November 22, 2010

Gift Cards

I have two thoughts about gift cards. One is that I do not like to give them and two is that I love to receive them.

Receiving them? That's easy! I get to choose what I'd like/need/want most without having to return something I don't. Perfect!

But in my little world of gift giving, the best part is knowing someone well enough to know that they will just L-O-V-E what I chose for them and never even dream of returning it.

When I find myself hardly able to contain my own excitement, then I have no doubt that I succeeded in finding the perfect gift. And I love THAT more than receiving, I really, really do!


I just can't seem to wrap my head around the hunt this year though. I need to do something easy to let go of the stress I am feeling and something simple to keep my holiday budget in check. And I'd also like something that says "I thought about you" when I chose this.

I'm really leaning towards a gift card with a hand made card holder. So now I'm on a new hunt. I'm looking for the world's best handmade gift card holder. Do you know what it is?? Please comment and share any links you'd like to! If you have a photo to share, you can email it to me: suzanne@pennywisearts.com

Thanks in advance, I know you'll come through for me! Ü

Hugs,
Suzanne
Uh oh. Here it comes.

I can feel it starting in my gut... HSP - "holiday season panic". Thanksgiving is nearly here, which means Christmas is looming with a capital "L" and I haven't bought a single gift, nor do I have any grand ideas of what gifts to give (that are within my budget).

I really WANT to MAKE special things for my friends yet I feel completely overwhelmed and uninspired. Sigh. What a familiar place for me. If you haven't gotten a Christmas card from me in the past, this would be the reason.

December 25th happens on the same day, every year and yet somehow it always seems to sneak up on me. How does this happen? Every year I vow to myself that the next year will be different. (Did you hear it? That was this year's vow Ü ). Just like with New Year's resolutions, my good intentions generally evaporate once the pressure is off somewhere around February.

All around me I see really amazing women who seem to have it all under control,... taking the holidays in stride while cranking out gorgeous Christmas cards that they actually mail on time. At the same time the hold down jobs and are making incredibly thoughtful and time consuming gifts for their friends and family. If you are one of them, HOW do you DO it?? Please share your secrets with the rest of us!!?? (This is where you click the "comment" button, pretty please?)

Hugs,
Suzanne

Tuesday, November 2, 2010

Mini’s Are Back And Better Than Ever!!

IMG_0559 If you are a fan of our MINI MICRO BEADS then you may be aware that it’s been a challenge for us to get them back in stock. 

Several months ago our supplier decided to “go green” and started using different glass products in the manufacturing process. 

The result was devastating to us at Pennywise because the “salt and pepper” effect is definitely NOT what we’re going for!

Sometimes the universe pushes us to make changes we wouldn’t otherwise make, and in this case it has turned out to be a blessing because we were able to find a new supplier that offers beads that are far superior to any we have ever had before!!  Clean, sparkly and almost no black culls, these beads are TOP QUALITY! 

Of note, these mini beads are just slightly larger than the ones we previously offered.  You may also notice the new regular sized micro beads to be slightly larger than before.  As we sell out of the regular sized micro beads and the ultra fine beads they will be replaced with beads from our new supplier!  Soon, all will be the BEST QUALITY we’ve ever been able to offer!  Ü

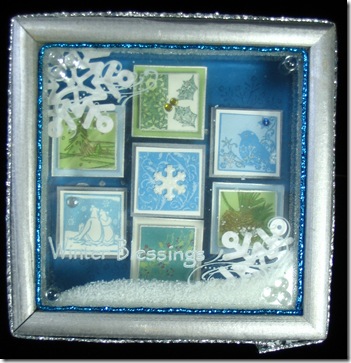
To jazz up this informational letter, we’re featuring artwork by PWA designer Michelle McCarthy.  Michelle created this stunning shaker shadow box featuring perfectly sized inchie stamps.

IMG_0559

Coordinating layers of cardstock back each image and a small sparkly gem adds just enough bling to finish it off.  So easy!  The inchies were then raised at varying heights with layers of foam tape.

Not shown well in the photo, Michelle has even beaded the shiny blue ribbon around the inside perimeter using O’So Sticky Tape!  Finally, on the outside of the glass she stamped snowflakes and Winter Blessings with white opaque ink.  Micro beads shake loosely around the inchies making this gorgeous box interactive and a beautiful display.


P.S.  We ended up with 100 pounds of the “green” manufactured minis and 100 pounds of ultra fines - so if you have a need for “salt and pepper” beads, let me know!  I’ll sell the 2 pound bags for $5 each!  (They are not currently offered on the website so you’ll need to shoot me an email:  suzanne@pennywisearts.com 

Sunday, October 31, 2010

Happy Halloween

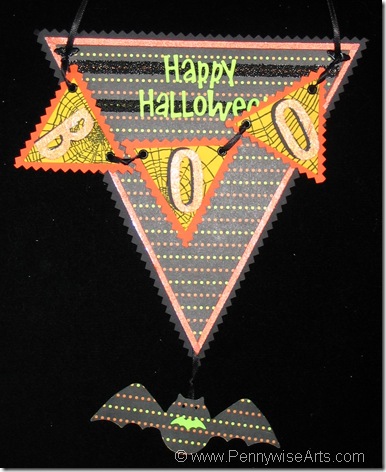
Being sick for the whole month of October really didn’t leave much room for blogging but I just HAD to get Chriss Grabb’s spooky creations up for you before the holiday past by!

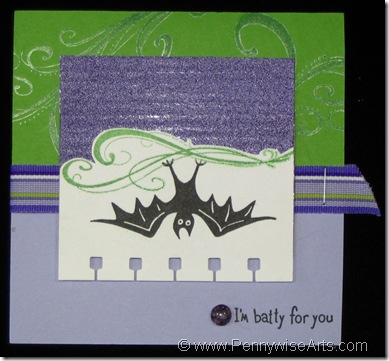
Halloween is Chriss’s favorite holiday and she loves to create all things bats year round!

This fun banner has been hanging in my kitchen:

Boo

Lot’s of great paper layers with a spider web background stamp and micro beaded letters make up this great decoration.  Oh, and lets not forget the due cut bat dangly!

Chriss also created this great Halloween card: Batty I think this photo showed the sparkly watermark background off very well, but the lavender micro beaded background not so much.  Some things you just gotta see in person!

Thursday, September 30, 2010

Floral Fancy

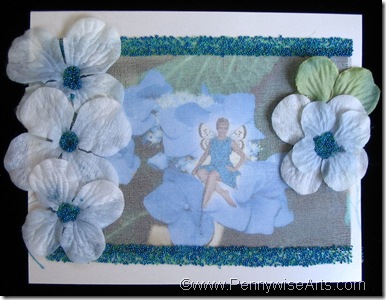
Floral by steph

Stephanie Loomis’s fancy floral card has so many great elements!  I really love how the blue, turquoise and sage colors work together in this design. 

I believe the background is one of Stephanie’s digital creations.  Ü  To that she added a border of blue micro beads to the top and bottom with strips of O’So Sticky Tape.  The finishing touch is the silk flowers with micro beaded middles.

Monday, September 27, 2010

Simple Beauty

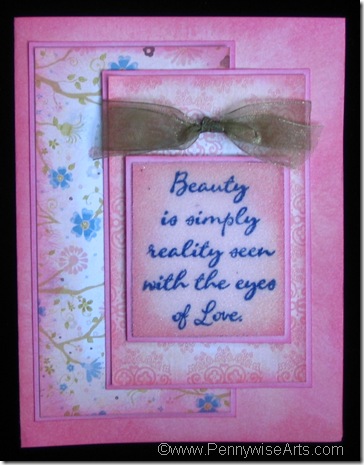
IMG_0259

I really love this bright multi layered card by Beki Ward.  It starts with a cardstock base that has been edged with pink ink.  From there Beki builds up six more layers of papers, two patterned that have been backed by pink and one white layer that has been stamped, edged in pink ink, micro beaded with ultra fine beads and another backing of pink cardstock.  The olive ribbon pulls it all together and coordinates with the branches of the bottom pattern.

This card really brings home the old adage that when in doubt, layer, layer, layer!

Thursday, September 23, 2010

Distressed Tote

This darling little wooden tote made by Marianne Colschen sits on my desk.  It is the perfect size to hold business cards that I want to keep handy!

IMG_0271

She painted the wood black and added stamped and distressed papers to all four sides.  Each side is them bordered in black micro beads with Sure Tac glue to make the beads really stand up!

Saturday, September 18, 2010

Postage Collage

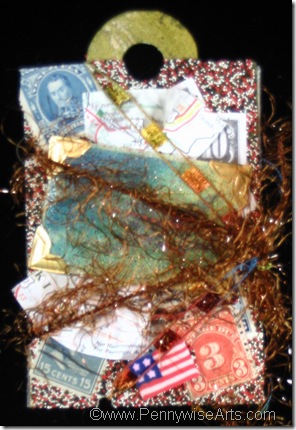
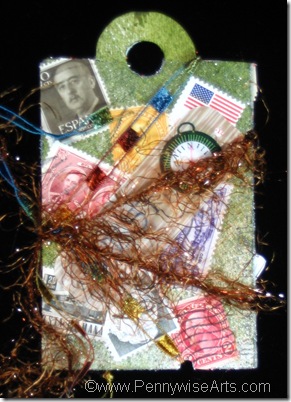
Michelle McCarthy used a fun Serendipity technique on this tag:

michellefront2

She covered each side of the tag with O’So Sticky Tape and layered all of her collage items onto the tape.  As one of the last steps she filled in all of the gaps with micro beads!

michelleback2 

There are so many fun items on these tags!  I’d love for Michelle to share what all she used!  (I didn’t get to keep one of these for my book because I only did one set of tags and Michelle did two.)

Friday, September 17, 2010

Bead Masking Basics

Bead masking is a technique I haven’t played with in awhile! 

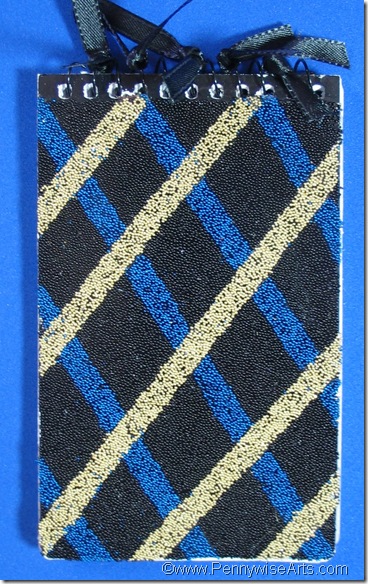
Thanks to Marianne Colschen for reminding me about this fun beadie way to embellish!  Today’s post is a little notepad that Marianne shared with me.

Years ago I did a photo tutorial of bead masking for one of our free online classes.  We have lots of those tutorials on our website now for your use.  I’ve edited the bead basics masking class to update the information for this blog post.

bead masking

My photography has definitely evolved over the years and I apologize for the poor quality of photos below!

This project idea comes from the Design Originals book “Stuck On Beads” Volume 1 (which is no longer in print. )

Supplies:

O’So Sticky Tape sheet, micro beads in various colors, plastic tape liners from used up O’So and something to stick it all onto.

I have chosen to use a dark piece of cardstock to contrast and set off the bead design on my card.

Directions:

Step 1

Cut a piece of O’So Sticky Tape (from a sheet) into card front size 5.5” by 4.25”

Apply to the front of a card by using our tried and true “tape trick” which is done by only peeling back a corner of the liner.  This allows you to move and manipulate the tape sheet until it is perfectly in place on the card.  Press down on the exposed corner to anchor the tape sheet and then slowly pull away the liner smoothing the tape down onto the card as you go.

For this project, it really doesn’t matter which liner you remove first, the paper or the red plastic.  (Please note that our paper liners changed from a mustard color kraft paper to white paper in 2004).

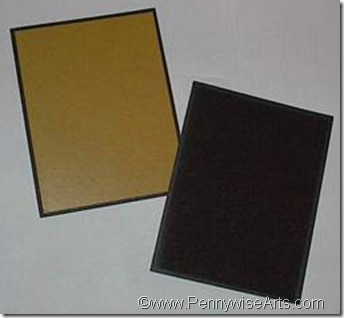
When you are finished with Step 1 the front of your card should be completely covered with O’So Sticky Tape – like this:
clip_image002

I am showing you two examples – in the one on the left, I peeled the red liner first. In the one on the right I peeled the paper liner first – it doesn’t matter which way you do it.

Use whatever size tape liners you have on hand.  Strips can also be cut from sheet liners but you must take care to only put the release side down on your project if you use any paper liners.

In this tutorial I’ll be using 1/4” size but it really can be any size.  If all you have is 1” liners, and you want a 1/4” line, then just trim the liners.  If you have a lot of paper liners left over from other projects, you can cut those up to use.  In fact, you could even get fancy and cut the paper with decorative scissors if you want to.  Remember though that the red liners are made of plastic and have a “rubbery” texture to them – so I wouldn’t recommend that you try to cut them decorative scissors.

Step 2

Remove the liner from the tape you placed onto the card front, exposing the entire adhesive. Try not to touch it or bump it – cause you’ll get stuck.

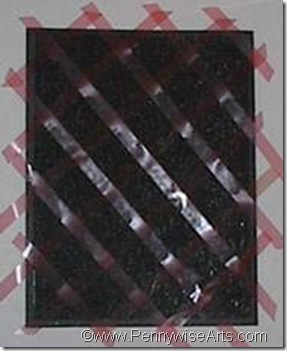
Lay the liners onto the exposed adhesive in any pattern that suits you. It is okay to cross over with this method – it’ll come back up easily.

You’ll want to press the liners down firmly onto the adhesive – I used a pencil eraser to rub along each piece to make sure it was stuck down good! You may also want to trim any long ends – to keep them from catching and pulling off before you want them to.

This is what I did:
clip_image004

Step 3a

The adhesive from the sheet placed onto the cardstock in step 1 showing through the criscross design I made with the liners. This open area is what will be beaded first.

Press the card front into whatever color you would like.

Insert Picture

I was planning to insert a picture here – but when I peeled away the first liners I got so caught up in the moment that I totally forgot I was preparing for a class and I steamed onto the next step. Oops!


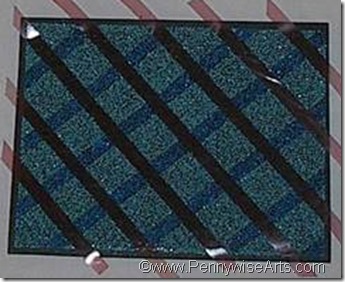
Step 3b 

Next, remove the top layer of liners from the card and press into another color of beads.
clip_image006

So far, I used the Light Blue Opaque in step 3a (the one I didn’t get a picture of) and then Royal Blue Opaque.


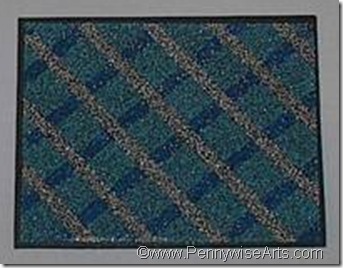
Step 3c

Remove the last layer of liners and press into a third color of beads.

I chose silver, and am now thinking that I would have liked it much better had I used the silver FIRST, so that all my “diamonds” were silver rather than light blue. That’s okay – I’ll try it again another time!
clip_image008

And don’t forget that you can SAVE THESE LINERS TOO! Yep – you can just keep on using them over and over and over – they don’t wear out!

Masking Notes

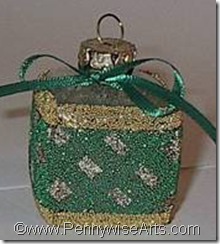
My husband, Brian really gets credit for coming up with the whole “Save Your Liner” campaign. This is what he created with recycled liners:
clip_image010


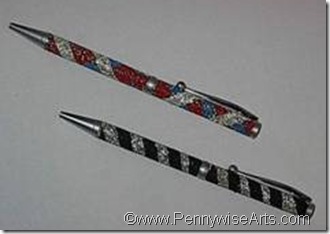
Our son Jordan created some very cool beaded pens using the masking technique:
clip_image012

He also made a neat vase with just ONE sheet of O’So Sticky Tape and LOTS of recycled liners:
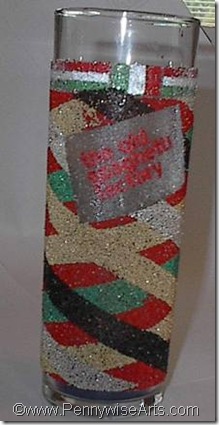
clip_image014

Here’s a larger view of Marianne’s little notepad:
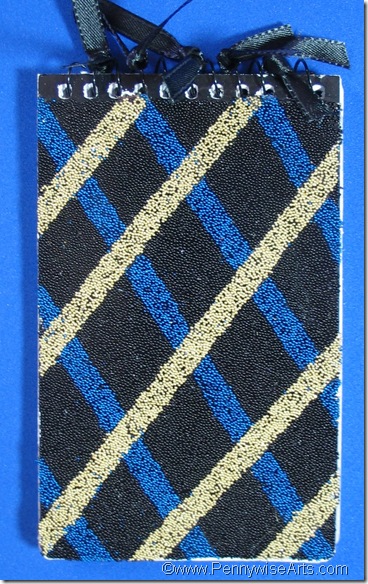
bead masking