Showing posts with label floral. Show all posts

Wednesday, June 6, 2012

Be Happy Now Shaker Card Kits

I’ve had people asking me to do kits for years, and for years I have resisted.  Now I am asking myself, “why”?  Honestly, I don’t know because since I’ve started making them (and since my loyal customers and beadie buds have been buying them) I’m having way too much fun! 

rainbow cropped It’s sure a heart boost to know that so many of you appreciate what I do and want to have a kit to do it too!   Ü  Thank you!!!

This next card was designed with my friend Tracy Mathia who is visiting me this week.  I love the bright colors she put together for this shaker design!  We’ve pre-stamped all the parts and the kits include everything needed except for scissors and glue.  Yep every detail is covered – even step by step instructions, micro beads and foam tape are in there!

Kits are $5 each with free shipping, and if you place an order from the website the kits are only $3 each (since you have to pay for the shipping of the beads I figure it’s a good wash.)  The easiest way to purchase kits is to email me and let me send you a Paypal request, then I can print a shipping label online and it’s super fast! 

So keep showing me the love, it makes my heart and my pocketbook feel good!  Ü

Hugs, Suzanne

Friday, June 1, 2012

Flower Frenzy!

IMG_1798  I’ve been on a paper flower kick lately!  There are so many variations and possibilities that it makes my head spin! 

If I were to spend much time on Pinterest looking at paper flowers I would never actually get to MAKING any!

Good thing this was one of the very first sites I found!  Made from coffee filters colored with water and inks I found the coloring process to be just as fun and fulfilling as the flower making process.  Ü

Sasilla has a complete photo tutorial on her blog.   http://kuchnia-pelna-cudow.blogspot.com/2011/02/zapraszam-na-kawe.html

This is my flower garden so far:

Flower Garden

On my next batch I plan to include some fun rubber stamped images onto the filters and see how that changes the way they look.  I’ve just started adding mixed micro beads to the tips of the petals and am delighted with how much texture it adds! 

Flower to bead

I just used a glue that I could apply fairly thin and that I knew would dry clear.  I touched the petals lightly with glue and then poured the micro beads over it.  Best to do this over a tray so that the extra beads can be tapped out of the flower.

Below  is my first completed and beaded flower.  I wasn’t sure how it would turn out so I picked the “ugliest” filter that I had colored so I wouldn’t be sad if it flopped.  I don’t think it’s ugly at all any more!  Ü

IMG_1801 So if you don’t hear from me for awhile,…… I’m probably in the craft room with my color wash sprays, colorful bottles of re-inkers and micro beads! 

Hugs, Suzanne

Monday, May 28, 2012

Flower Power

IMG_1792

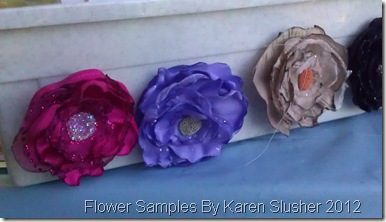
karen hat 2These flowers are Hot-Hot-Hot!  Chances are you have seen something like them in stores and clipped on purses and in many hairstyles.  This is one variation created by PWA designer, Karen Slusher.  Karen attended our annual retreat last month and shared her “power flowers” with us there.  

Here’s a photo of Karen’s project station.  Note, an open candle flame is used!

DSC00457

Supplies:  Assorted fabrics, scissors, tweezers, candle, lighter, 3-D Zots, Pennywise Bubble Beads, Glue, Pin back or Hairclip, Needle and thread, small piece of felt for backing.

Directions:

1. Cut assorted fabric pieces into general flower shapes.  They don’t need to be perfect – just rough petals.  The largest piece should be about 4” across.  Karen used 6 pieces of fabric in 3 different sizes. 

2. Once the cutting is done, light a candle and hold the petals above the flame. Lower the fabric toward the flame turning as the edges start to melt and curl.  Use tweezers to hold fabric if needed.

** Do not let the fabric get any closer to the flame once melting starts.

** Keep turning the fabric so it doesn’t linger in the flame and start to burn.

3. Once all pieces are melted, stack them together as desired and place on top of felt square.

4. Using the needle and thread, stitch through the felt and up through the flower, then back through the felt. Do this a couple times to hold the flower together. Knot and cut under the felt.

5. To make the beaded center choose a bead type to use as your flower center (Bubble beads or a mixture of colored micro beads are fantastic options).  Tear off a 3D glue dot (ZOT), leaving the backing paper to hold it.  Dip the ZOT into your chosen beads and press to cover.  Carefully peel off the backing from the beaded ZOT and place in the center of your flower.

6. Affix a pin back or hair clip to the back of your flower

7. Wear as a pin on clothing, purse, scarf, etc.

Quick and easy these pretty flowers make for instant beadie gratification!  Karen made this royal blue one special for moi.  :)

IMG_1795 IMAG0480

IMG_1794Try mixing and matching colors and fabric textures.  I’ve seen some really pretty ones done with sage and taupe together – super elegant! 

Hugs, Suzanne

Wednesday, August 10, 2011

Floral Lattice

Lattice by Marianne Colschen

I’m still in process with my craft room.  Cleaning, sorting, clearing, organizing and discovering.  The latter is the best part of all, finding treasures!!

I can’t remember if this beauty by Marianne Colschen has been on the blog before or not, but it turned up and I wanted to err on the side of you definitely getting to see it!

O’so faintly you can see the embossed diagonals on the white cardstock.  Marianne used them as a guide to lay down Sure Tac glue to create the micro beaded lattice upon which her pretty flowers bloom.

I definitely need more space just to display all of the goodies I’ve collected over the years!

Tuesday, August 3, 2010

Bubble Beaded!

Marianne Notebook

Marianne Colschen has been a busy, busy beader finding all kinds of fun and unique ways to incorporate our newest Iridescent Bubble Beads into her art! 

This darling notebook is small enough to tuck into a purse and stylish enough to make you want to actually write important things down in it!  Ü

BONUS!  This week one lucky customer will find this bead-i-ful beauty tucked into their order envelope!  All orders placed between Tuesday August 3rd and Saturday August 7th will be assigned a number in numerical order of receipt.  A predetermined “secret number” has already been assigned as the winner and if you happen to be “that” order number then you win!  We hope the winner will post a comment back to this page too – cause it’s always fun to hear from excited customers!

We look forward to sharing more of Marianne’s art with you all month long so keep coming back!

Hugs,

Suzanne

Oh –and go place your orders!  www.PennywiseArts.com !!

Tuesday, July 13, 2010

Happiness is…

Happiness is Jennifer Toussaint’s pretty picket fence wall hanging!  So bright and cheery, it definitely makes me feel happy when I see it.  Happiness

Jennifer found most of her materials in her craft stash – I bet you probably have most of them already (or something similar)  too!

Materials:

Micro beads from Pennywise Arts in stream, lettuce, gold and iridescent colors.

Wooden picket fence with 2 flowers pre-attached

2 chipboard butterflies

2 large pop dots

12 inches gingham ribbon in blue and white

Happiness or other sentiment stamp

Cardstock scraps in white, pink and green

Opaque glitter

Acrylic paints in lavender, light blue, pink, yellow, white and light green

Crackle effect liquid

2 small gemstones for butterflies and one large gemstone for flower center

Stickles purple glitter glue

Directions:

Paint picket fence with white paint. Let dry and then cover in crackle finish. Paint flowers with pink and blue and then the stems and leaves with green. Cover flowers in coordinating micro beads in stream, lettuce, bubble and gold. Place yellow gem stone in middle of blue flower with crystal effects. Stamp phrase onto white cardstock. Trim around word or phrase. Back this white piece with pink cardstock and then green and white scrapping paper. Adhere to fence with adhesive tape. Cover butterfly chipboard pieces in lavender acrylic paint. Let dry and then cover in opaque glitter. Draw a line with Stickles purple glitter glue down the middle for the body. Then adhere small gemstones for the head of the butterfly. Attach with pop dots. Thread ribbon through holes for hanging.

Tuesday, June 22, 2010

“Just A Note” From Jean

Jean Just Flower Closeup bLet Jean inspire you with another one of her fresh and fun floral designs!

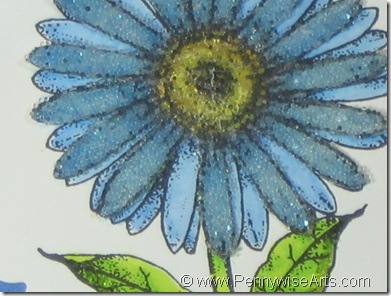
In this tutorial Jean beads just some of the flower petals to create the multi dimensional Gerbera Daisy shown above.  Below are her easy to follow step by step instructions.

  Jean Just A Note

Materials:

Clear and Lettuce Green micro beads

O’So Sticky Tape Sheet

Stamps: Li’l Davis Designs, The Angel Company

Scallop Circle Nestabilities

Tuxedo Black Ink

Cardstock: Stampin’ Up!

Patterned Papers: K & Company

Pink Sheer Ribbon

Metal Tag

Glue Pen

Copic Markers: B21 Baby Blue, B24 Sky, YG23 New Leaf, YG25 Celadon Green

Directions:

Finished Card size is 5 ½ x 5 ½. Cut patterned paper slightly smaller. Attach to card front.

Cut a scallop circle in white and a size bigger in blue. Stamp the white piece with a Gerbera Daisy. Color with Copics. Stamp the daisy again on a white scrap piece. Color only the flower and cover with O’So Sticky Tape sheet. Cut out flower from sticky sheet removing some of the petals. (This allows the other flower to show through)

Cover Completely with clear beads. Bend petals slightly and attach over full daisy.

Use a glue pen on bottom part of leaves and cover with lettuce colored beads. Let dry. Attach flower circle to blue circle and to front of card.

Add a pink ribbon and stamped metal tag.

Love Jean’s style?  Follow her on Blogspot!
www.artsyj.blogspot.com

Thursday, June 17, 2010

Silent Beauty

It still feels like “April Showers” here in the Snoqualmie Valley and that means I am still waiting for my potted flowers to really make their magic.  Thankfully I had this card from PWA designer Jean Sunderman to brighten a rainy day!

Jean’s creative floral centers made from mico beads and masks really make magic happen on this card:

Jean Silent Beauty

Silent Beauty by Jean Sunderman

Materials:

Micro beads: Copper Opaque, Silver, Dark Rose Opaque, Light Green Opaque, Gold

Cardstock: Orange, Green and White- Stampin’ Up!

Stamp: Li’l Davis Designs

Brilliance Inks: Lime and Yellow

Colorbox Chalk Ink: Pansy, Green and Tangerine

Bottle Caps

O’So Sticky Tape Sheets

1” Circle Punch

Plastic stencil of flower


Once you have it all together, here’s the how to:

Directions:

Create a card to fit a regular business size envelope. Card should measure 9 x 4 or so.

Cut patterned paper ¼ inch smaller. Mount to green cardstock and trim. Attach to front of card.

Jean has a clever way to create a perfect shadow image from just one unmounted stamp!  Here’s what she does: 

Attach the clear stamp to block the stamp face down on the block (flipped over from “normal”.   Now use the back of the stamp to create a “shadow” on white cardstock. Clean off and attach stamp the correct way with the stamp face up. Stamp in a darker or coordinating color to create the outlines of the design.

Stamp three flowers and cut out as shown.

Flatten 3 bottle caps. Remove any rubber on the inside. Punch out three 1 inch circles of the O’So Sticky Tape Sheet. Stick to the inside of each bottle cap. Peel off backing and lay flower stencil on the sticky sheet. Cover with beads. Remove stencil and cover the rest with another color.

Attach all bottle caps to flower centers. Add flowers to front of card with one flower raised with 3D foam tape. 

Here’s a close up of one flower that shows the neat contrast inside the bottle cap:

Jean Bottlecap Flower Close Up 

To finish the card stamp a quote on white cardstock. Mount to orange cardstock and trim. Add to card front. Stamp a small flower, add beads to center and attach with 3D foam tape.

Be sure to visit Jean’s blog where you can see even more of her artwork:  www.artsyj.blogspot.com

Friday, May 21, 2010

Bed Of Beads Stamping

by Michele Aiello-Zendejas

Please note:  These instructions are copyrighted.  Feel free to share this link with your friends and stamp groups.  If you choose to reproduce "Bed of Beads Stamping", please credit Michele Aiello-Zendejas of Pennywise Arts for creating the technique.  Thank you! :-)

Supply List:
Cardstock (colors of your choice)
Bold Rubber stamp, without a lot of detail
StazOn Ink (color of your choice, dark shades work best)
Coordinating color permanent marker
Pennywise Arts Micro Beads (solid color of your choice, opaque or translucent, light colors work best)
Pennywise Arts O'So Sticky Tape Sheets
Flat back gems and/or other embellishments such as punched shapes, buttons, etc.
Tidy Tray or something to catch the micro beads when you pour them onto the O'So Sticky Tape
Brayer
Paper Trimmer

Directions:


Step 1:

Gather your supplies.  Choose the rubber stamp you want to use and cut a piece of O'So Sticky Tape to size. Choose coordinating cardstock and cut to the size you need to layer and decorate a card.


Step 2:

Peel off one side of the tape and adhere it to a piece of cardstock cut to the same size.  Pull off the liner and cover it with micro beads.  Brayer the beads in so they are embedded into the tape.


Step 3:

Stamp directly on top of the bed of micro beads with StazOn ink. 


Step 4:

Use a permanent marker to color the edges of the "Bed of Beads".  You can also run the edges against your ink pad.  Use the marker to fill in any areas of the stamped image that did not print well.  Use a pouncing motion when you apply color.  If you try to color the micro beads like you are coloring paper, you will end up accidentally removing some of the micro beads.


Step 5:

Apply flat back gems and/or any embellishment you would like.

Your completed images will look similar to these:

1.  White cardstock, light green opaque PWA micro beads, and black StazOn. 
2.  White cardstock, white opaque micro beads, and black StazOn.
3.  White cardstock, light lavender translucent micro beads, and black StazOn.
2.  White cardstock, white opaque micro beads, and red StazOn.


Step 6:

Cut a piece of cardstock about 1/4" larger than your bed of beads.  Edge with a permanent marker or ink pad.  Layer as desired.


Step 7:

Layer image as desired to create a card.


Michele Aiello-Zendejas


Michele Aiello-Zendejas


Michele Aiello-Zendejas


Michele Aiello-Zendejas


Diane Young


Beth Ullman


Jennifer Toussaint


Jennifer Toussaint


April Day


Jami Zdankus


Evelyn Spikes


Dot Alcorn


Georgia Wood


Theresa Dalzell-Wells


Theresa Dalzell-Wells


Diane Young


Evelyn Spikes


Diane Young


Theresa Dalzell-Wells


Suzanne Glazier


Yvonne Grimes