Tuesday, June 29, 2010

Butterfly Art Book

Art Butterfly Book Cover

Perfect for a day when you just want to sit and make something, this butterfly book by Jean Sunderman is full of easy samples of collage art.  The finished book is an inspiration to collagists everywhere!

Materials Jean Used:

Gold Opaque, Orange Translucent, Green Opaque and Clear Micro beads from Pennywise Arts

Winged Things I and II Collage Sheets from Pennywise Arts

O’ So Sticky Tape and Sheets from Pennywise Arts

Butterfly Chipboard Book: Michaels  (For the SVG file of this butterfly just email me suzanne@pennywisearts.com !)

Paper: DCWV Once Upon A Time

Embellishments: Flowers, Scrabble Letters, Crowns, Pearls and Faux String of Pearls, Brads

Gold Leaf Paint Pen

Vintage Photo Distress Ink

Embossing powder


Once you’ve assembled your supplies, put on some good music and get going!  You’ll be surprised how quickly you can complete something if you have everything you need at your fingertips!

Here’s the rest of Jean’s book…

 Page 2

 Page 3

Here’s a great close up of one of Jean’s angels with beaded wings:

Page 3 Close

Jean Butterfly 4 cutPage 5 

If you need more direction, here you go:

Cover front and back of each butterfly with patterned papers. Be sure and punch whole after each side for metal ring.

Edge all pieces with gold paint pen.

Cut out various Winged Things and edge with Distress Inks. Add O’So Sticky Tape to various wings and areas on each collage piece.

Dip brads in embossing powder while still warm, stick in beads to create centers for flowers. Add Scrabble letters to cover and decorate each page as desired.

On last page decorate with letters to spell “art” and add collage sheet quote.


Thanks so much Jean!

Friday, June 25, 2010

Gentle

Jean ATC

Just a quiet little reminder to be gentle with yourself today.  Take time to breathe, center, rest, quiet, calm.  Yes.  You.  Are. Worth. It.  Ü


ATC by Jean Sunderman

Tuesday, June 22, 2010

“Just A Note” From Jean

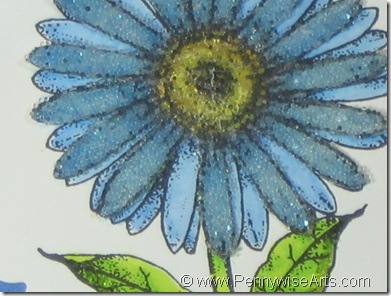
Jean Just Flower Closeup bLet Jean inspire you with another one of her fresh and fun floral designs!

In this tutorial Jean beads just some of the flower petals to create the multi dimensional Gerbera Daisy shown above.  Below are her easy to follow step by step instructions.

  Jean Just A Note

Materials:

Clear and Lettuce Green micro beads

O’So Sticky Tape Sheet

Stamps: Li’l Davis Designs, The Angel Company

Scallop Circle Nestabilities

Tuxedo Black Ink

Cardstock: Stampin’ Up!

Patterned Papers: K & Company

Pink Sheer Ribbon

Metal Tag

Glue Pen

Copic Markers: B21 Baby Blue, B24 Sky, YG23 New Leaf, YG25 Celadon Green

Directions:

Finished Card size is 5 ½ x 5 ½. Cut patterned paper slightly smaller. Attach to card front.

Cut a scallop circle in white and a size bigger in blue. Stamp the white piece with a Gerbera Daisy. Color with Copics. Stamp the daisy again on a white scrap piece. Color only the flower and cover with O’So Sticky Tape sheet. Cut out flower from sticky sheet removing some of the petals. (This allows the other flower to show through)

Cover Completely with clear beads. Bend petals slightly and attach over full daisy.

Use a glue pen on bottom part of leaves and cover with lettuce colored beads. Let dry. Attach flower circle to blue circle and to front of card.

Add a pink ribbon and stamped metal tag.

Love Jean’s style?  Follow her on Blogspot!
www.artsyj.blogspot.com

Thursday, June 17, 2010

Silent Beauty

It still feels like “April Showers” here in the Snoqualmie Valley and that means I am still waiting for my potted flowers to really make their magic.  Thankfully I had this card from PWA designer Jean Sunderman to brighten a rainy day!

Jean’s creative floral centers made from mico beads and masks really make magic happen on this card:

Jean Silent Beauty

Silent Beauty by Jean Sunderman

Materials:

Micro beads: Copper Opaque, Silver, Dark Rose Opaque, Light Green Opaque, Gold

Cardstock: Orange, Green and White- Stampin’ Up!

Stamp: Li’l Davis Designs

Brilliance Inks: Lime and Yellow

Colorbox Chalk Ink: Pansy, Green and Tangerine

Bottle Caps

O’So Sticky Tape Sheets

1” Circle Punch

Plastic stencil of flower


Once you have it all together, here’s the how to:

Directions:

Create a card to fit a regular business size envelope. Card should measure 9 x 4 or so.

Cut patterned paper ¼ inch smaller. Mount to green cardstock and trim. Attach to front of card.

Jean has a clever way to create a perfect shadow image from just one unmounted stamp!  Here’s what she does: 

Attach the clear stamp to block the stamp face down on the block (flipped over from “normal”.   Now use the back of the stamp to create a “shadow” on white cardstock. Clean off and attach stamp the correct way with the stamp face up. Stamp in a darker or coordinating color to create the outlines of the design.

Stamp three flowers and cut out as shown.

Flatten 3 bottle caps. Remove any rubber on the inside. Punch out three 1 inch circles of the O’So Sticky Tape Sheet. Stick to the inside of each bottle cap. Peel off backing and lay flower stencil on the sticky sheet. Cover with beads. Remove stencil and cover the rest with another color.

Attach all bottle caps to flower centers. Add flowers to front of card with one flower raised with 3D foam tape. 

Here’s a close up of one flower that shows the neat contrast inside the bottle cap:

Jean Bottlecap Flower Close Up 

To finish the card stamp a quote on white cardstock. Mount to orange cardstock and trim. Add to card front. Stamp a small flower, add beads to center and attach with 3D foam tape.

Be sure to visit Jean’s blog where you can see even more of her artwork:  www.artsyj.blogspot.com

Tuesday, June 8, 2010

Where Flowers Bloom

Pennywise Arts is so blessed to have many very talented designers creating just to inspire you!  This month we’ll be featuring the artwork of Yvonne Grimes and Jean Sunderman. 

 Yvonne head shot2

Yvonne

jean sunderman

Jean


Yvonne will start us off with a fun technique she calls “Beaded Paper Lace”.  She wrote excellent instructions to go along – so grab your supplies and give it a try!

IMG_0001

Beaded “Paper Lace” Card By Yvonne Grimes

Supplies:

· “Paper Lace” - Scrapbook paper that has a die-cut design with open spaces

· Contrasting paper for background

· Coordinating papers for stamped sentiment, matting, and A2 card blank

· Rubber Stamp with quote, sentiment, or other focal point

· O’So Sticky Tape Sheets

· Clear Mini Micro Beads

· Foam tape or squares

· Embellishments such as rhinestones, pearls, paper flowers, etc…

1. Cut the background piece of paper to 3-3/4”x5”. For best results choose a paper that contrasts with your “lace” paper as it will be covered with beads.

2. Cut a piece of O’So Sticky tape to 3-3/4”x5” and cover the background paper with it, but leave the red liner on for now.

3. Cut a piece of lace paper so it is just a little smaller than the background, and figure out your placement before removing the red liner and attaching the lace paper to the background. Use the red liner over the whole piece to press the lace paper down well.

4. Remove red liner and dip the whole piece in clear Mini Micro Beads. Press the beads in well with either a brayer or your fingers.

5. Attach the beaded piece to a coordinating paper layer cut to 4”x5-1/4”, and then attach to the cardstock blank.

6. Create the stamped image, layer with coordinating papers and attach to the beaded background with foam tape.

7. Embellish as desired.


Here’s another variation Yvonne did using the same technique:

beaded paper lace card 2


Won’t you share YOUR Beaded Paper Lace creation with us???

Sunday, June 6, 2010

Java Jolt Fat Book Swap

Coffee Book Logo

There is no better way to get back into the swing of things than with a swap full of delicious art!  Before you read another word go grab a cup of coffee, flavored or not, just the way you like it best.  Then sit back with this post and sip it slow.  Take in the aroma of creativity that will swirl in the air as you drink in the artwork of these talented ladies from our Pennywise Arts Yahoo Group.


steam cup

Our first cuppa comes from Cathy Varner. The brew in the top of her cup is a mix of brown, copper and silver opaque micro beads. 

Catrhy Varner


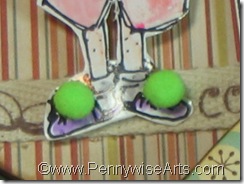
I love the little details that Cathy incorporated in her page.  The wild morning hair and fuzzy slippers add great fun to this design.

Cathy Detail


steam cup


Eunice Creswell is “Saving the world one cup of coffee at a time” with her earth friendly cup.
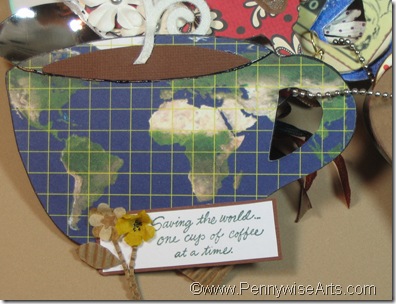
Eunoce Creswell

Eunice Detail


Eunice created the steam using white cardstock between two pieces of O’So Sticky Tape with clear micro beads over all to create the fun illusion of hot steam rising.  It might look fragile, but the curling steam has amazing durability due to the O’So Sticky.


steam cup


Jean Sunderman’s “Early Bird” definitely gets the freshest cup of coffee in the morning.

Jean Sunderman


Her micro beaded birdie is such a royal treat, second only to the crystal fun sugar cubes!

Jean Detail


steam cup

This stack of mugs reminds me of my cupboard!  Julie Imsland created her page of java by punching 9 coffee cups from decorative paper.  Each cup is covered with O’So Sticky Tape and micro beads.  Folks, at 10 players/pages that adds up to 90 beaded coffee cups!  Wow!     Julie Imsland Don’t miss the detail of the little wooden shelf that they all sit on!


steam cup


Karen Slusher expected to see lots of players shaking it up with shaker bead designs and was pleasantly surprised to learn that she was the only one. 

Karen Slusher Her cup features a unique shaker window featuring mocha (brown opaque) micro beads.  “No one can understand the truth until he drinks of coffee’s frothy goodness.”  Ah, yesssssss!


steam cup


Next is Kathi Hall’s claim that “her coffee is so good, she even drinks it herself”!  So many collage items add interest and discovery here.

Kathi Hall

Kathi Detail Kathi Back

Her big daisy features PWA’s newest bead baby, Iridescent Bubble Beads.  The back of  Kathi’s page is thickly embossed creating amazing texture!


steam cup


This yummy design was swirled up by Kelli Green.  Her java sports micro beaded brew with a scrumptious crema twirl.

Kelly Green


Kelli Detail


While they are hiding in the picture above I don’t want you to miss the darling dangling shrink plastic tags that Kelli attached to the handles of the cups.


steam cup


In case of a cafe emergency Lynn Lake has included a Starbucks Via as part of the “fat” in her design.  Suede paper forms the liquid in the cup.

Lynn Lake

On the back Lynn wrote:  “Great friends and a good cup of coffee.  Enjoy both as frequently as possible.”  I do agree!


steam cup


Michele Aiello-Zendejas experimented with coffee grounds and embossing powder to create the coffee in her cup.  The texture is awesome though sadly the embossing powder covered up the rich aroma of fresh ground coffee.  Take a whiff of your own coffee now to simulate the effect.

Michele Aiello Zendejas 


Sweet detail is exhibited in Michele’s Bubble Bead accents on the spoon and on the lip of the cup.

Michele Detail


steam cup


Yes, you can almost feel the coffee jitters setting in with this great page by Sally Bowman.  I love the effect that double stamping has here – it so clearly communicates the underlying intent. 

Sally Detail

Sally Bowen 


steam cup


And last but not least is my design which really represents the efforts of many.  Due to my continued struggle with TOS I needed lots of extra help to pull this off.  Thanks to all who helped inspire, loaned stamps, glued and tied – you know who you are and love and appreciate each of you so much.

  Suzanne Glazier

What started out as an eight page book of it’s own quickly shrunk as time ran out.  Eight down to three with a lot of goodness within.  Cups were cut with SCAL and my Cricut which was a huge part of the work.  The cover was stained with Tim’s Distress Ink and a watermark “spill” stamp.  Sealing them with embossing powder helped make them durable and shiny.

Suzanne Detail


I love this element of heart shaped steam rising from the cup ‘o love.  Red micro beads are held with Glossy Accents. 

Inside pages were distressed with different colors of Tim’s ink and crackle stamped.  (Credit Hampton Art Stamps)

Suzanne Inside

A hidden pocket holds a narrow tag.  Look how just crimping the background layers adds incredible depth and texture!

Suzanne More Inside


I’m always so pleased with the collaborative effort that everyone puts into our quarterly fat book swap!  Our Beadie Buddy artists are the best!  If you are interested in joining any of our ongoing swaps, be sure to join us in our little Yahoo coffee house community for all the details!


steam cup