Wednesday, June 6, 2012

Be Happy Now Shaker Card Kits

I’ve had people asking me to do kits for years, and for years I have resisted.  Now I am asking myself, “why”?  Honestly, I don’t know because since I’ve started making them (and since my loyal customers and beadie buds have been buying them) I’m having way too much fun! 

rainbow cropped It’s sure a heart boost to know that so many of you appreciate what I do and want to have a kit to do it too!   Ü  Thank you!!!

This next card was designed with my friend Tracy Mathia who is visiting me this week.  I love the bright colors she put together for this shaker design!  We’ve pre-stamped all the parts and the kits include everything needed except for scissors and glue.  Yep every detail is covered – even step by step instructions, micro beads and foam tape are in there!

Kits are $5 each with free shipping, and if you place an order from the website the kits are only $3 each (since you have to pay for the shipping of the beads I figure it’s a good wash.)  The easiest way to purchase kits is to email me and let me send you a Paypal request, then I can print a shipping label online and it’s super fast! 

So keep showing me the love, it makes my heart and my pocketbook feel good!  Ü

Hugs, Suzanne

Sunday, June 3, 2012

New Room Card Kits For Father’s Day!

    I was really surprised how popular the room card kits I made up last week were!  All of your excited responses made me want to make more!  This time PWA designer Julie Imsland and I collaborated to create a “man cave” with deep rich colors and masculine decor – just in time for Father’s Day on June 17th.

manroom1

These kits are ready to ship so you’ll have plenty of time to put yours together for the father or man in your life.  Though “Happy Father’s Day” has been pre-stamped for the belly band you can always turn that piece over to add your own sentiment for another occasion.

Since there are a limited number of kits available, please email me directly to place your order.  I will send you an invoice through PayPal which enables one click shipping and makes my job easy!  Each kit is $5 with free shipping.  If you place an order on the PWA website and want to add a card kit or two to that, you’ll get a discount price of just $3 per kit!  Ü

MancardCover

Kits contain all the parts and pieces (stamped and plain) including the micro beads and O’So Sticky Tape as shown in the sample card.  All you need is some scissors and glue!

Thanks for making me feel loved and appreciated with your comments and purchases, my beadie buddies are the best!

Hugs, Suzanne

Friday, June 1, 2012

Flower Frenzy!

IMG_1798  I’ve been on a paper flower kick lately!  There are so many variations and possibilities that it makes my head spin! 

If I were to spend much time on Pinterest looking at paper flowers I would never actually get to MAKING any!

Good thing this was one of the very first sites I found!  Made from coffee filters colored with water and inks I found the coloring process to be just as fun and fulfilling as the flower making process.  Ü

Sasilla has a complete photo tutorial on her blog.   http://kuchnia-pelna-cudow.blogspot.com/2011/02/zapraszam-na-kawe.html

This is my flower garden so far:

Flower Garden

On my next batch I plan to include some fun rubber stamped images onto the filters and see how that changes the way they look.  I’ve just started adding mixed micro beads to the tips of the petals and am delighted with how much texture it adds! 

Flower to bead

I just used a glue that I could apply fairly thin and that I knew would dry clear.  I touched the petals lightly with glue and then poured the micro beads over it.  Best to do this over a tray so that the extra beads can be tapped out of the flower.

Below  is my first completed and beaded flower.  I wasn’t sure how it would turn out so I picked the “ugliest” filter that I had colored so I wouldn’t be sad if it flopped.  I don’t think it’s ugly at all any more!  Ü

IMG_1801 So if you don’t hear from me for awhile,…… I’m probably in the craft room with my color wash sprays, colorful bottles of re-inkers and micro beads! 

Hugs, Suzanne

Wednesday, May 30, 2012

Too Cute Room Cards

In the early days of PWA we had weekly live online classes where group members shared specific projects and “students” shared their creations from that lesson.  With up to 30 beadie buddies IMG_1790from all over the world participating at once it was wildly fun!
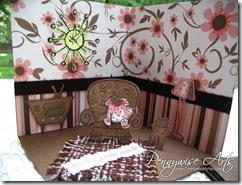
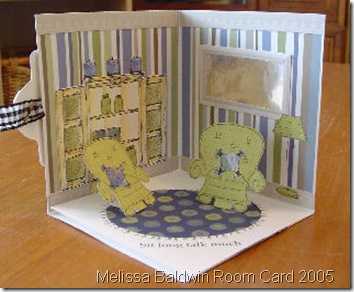
Room cards were one of the classes taught by Melissa Baldwin of  The Stamping Studio in 2005.  I thought they were so much fun that I used mine for a PWA shoebox party shortly afterwards.

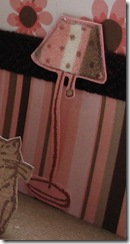
Close up details show PWA micro beads used to accent the television screen and make the lampshade shimmer.microbeadtv beaded lampshade

The retro clock hanging on the wall has bubble beads affixed to the points.

bubblebeadretroclock

A closer look from the top shows the fabric rug, kitty cat, overstuffed chair and pillows that actually look fluffy from being bent around foam tape.

IMG_1791

room I used stamps from The Stamping Studio for my decor.  The paper is from Chatterbox. 

All folded up the card is held closed by a decorative ribbon band. Stamps on the cover are CTMH and SU.

IMG_1787 Here are some of  the other cards shared in class that night with the card instructions to make your own posted at the end.

Anna Justice created a darling room with a window and decorated the outside of her card to look like the outside wall of the room!

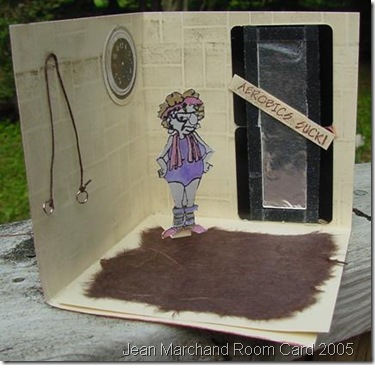
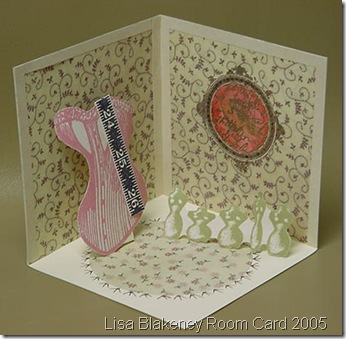
Anna Justice 2 Anna Justice  Diane Raschal Georgia Wood Jean2  Lisa Heusler3  Marianne Colschen Melissa Baldwi Michelle McCarthy Stephanie Loomis

Room Cards
Created by Melissa Baldwin of The Stamping Studio
Melissa@thestampingstudio.com
www.TheStampingStudio.com

1. Cut your Cardstock in a perfect square. Mine is 8.5 x 8.5

2. Fold your cardstock in half. A bone folder, or the edge of
an inkpad, is a great way to get a nice crisp fold.

3. Unfold, then fold in half the other direction.  When unfolded,
your creases should look like a cross, or plus sign.

4. Now go half way up one of the fold lines, and using a craft knife
and a ruler, make a straight cut. 

5. Move your ruler over slightly (I think a "smidge is the technical term"!) And make another straight cut along side it. paper w slot

6. You should now have a thin piece of cardstock, which your can go ahead and remove by cutting off the end near the fold.

7. Fold the paper half way up.

8. Then you will fold the bottom right flap over the left flap, and
it should stand up!
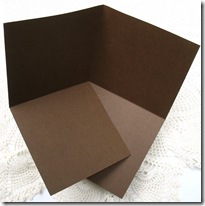
How It Folds

9. Well.... it will stand up with a little coaxing! You will need
to bend it a little so it will stand up straight. Let's call the
technical term for this "Paper Manipulation"! LOL!

10. Wala! You now have the framework done for your room card. It is the perfect size to decorate!

11.  Now feel free to decorate the inside of your room anyway you would like!… How about stamped wallpaper, molding, pictures in frames, and don’t forget the furniture! 

12. Let me tell you how to attach the furniture so it will hold
Tabsdown when you close the card; You  need cut strips of paper of varying widths for each piece of furniture you want to place in the room.  They should be the same color as the floor, and about 1 1/2 inches by 1/2 inch. You can cut them down in length as needed.

13. Fold each one in half to make a tab and place glue on one side and stick it to the backside of the furniture.

Tabs Applied

14. Then glue the other side of the tab and put  your furniture into place.

15. To close the card up for mailing, fold down the furniture, then fold up as shown.

Cover

These rooms are all just too cute!!

Hugs, Suzanne

Monday, May 28, 2012

Flower Power

IMG_1792

karen hat 2These flowers are Hot-Hot-Hot!  Chances are you have seen something like them in stores and clipped on purses and in many hairstyles.  This is one variation created by PWA designer, Karen Slusher.  Karen attended our annual retreat last month and shared her “power flowers” with us there.  

Here’s a photo of Karen’s project station.  Note, an open candle flame is used!

DSC00457

Supplies:  Assorted fabrics, scissors, tweezers, candle, lighter, 3-D Zots, Pennywise Bubble Beads, Glue, Pin back or Hairclip, Needle and thread, small piece of felt for backing.

Directions:

1. Cut assorted fabric pieces into general flower shapes.  They don’t need to be perfect – just rough petals.  The largest piece should be about 4” across.  Karen used 6 pieces of fabric in 3 different sizes. 

2. Once the cutting is done, light a candle and hold the petals above the flame. Lower the fabric toward the flame turning as the edges start to melt and curl.  Use tweezers to hold fabric if needed.

** Do not let the fabric get any closer to the flame once melting starts.

** Keep turning the fabric so it doesn’t linger in the flame and start to burn.

3. Once all pieces are melted, stack them together as desired and place on top of felt square.

4. Using the needle and thread, stitch through the felt and up through the flower, then back through the felt. Do this a couple times to hold the flower together. Knot and cut under the felt.

5. To make the beaded center choose a bead type to use as your flower center (Bubble beads or a mixture of colored micro beads are fantastic options).  Tear off a 3D glue dot (ZOT), leaving the backing paper to hold it.  Dip the ZOT into your chosen beads and press to cover.  Carefully peel off the backing from the beaded ZOT and place in the center of your flower.

6. Affix a pin back or hair clip to the back of your flower

7. Wear as a pin on clothing, purse, scarf, etc.

Quick and easy these pretty flowers make for instant beadie gratification!  Karen made this royal blue one special for moi.  :)

IMG_1795 IMAG0480

IMG_1794Try mixing and matching colors and fabric textures.  I’ve seen some really pretty ones done with sage and taupe together – super elegant! 

Hugs, Suzanne

Sunday, April 29, 2012

There’s A Song In The Air

Suzannes2As you read this I am retreating with 28 of my PWA pals at a lodge in Cle Elum, WA.  We are stamping the weekend away, sharing projects, stories, games and lots and lots of laughter!  I know you wish you were there too!

The Pennywise Arts retreats are “Shoebox” retreats.  That’s what we call it when everyone brings a project (in a box) to share with everyone else.  I bring one project with enough supplies for 28 gals to create it and over the course of the weekend I create 28 other projects from their boxes!

My project was inspired by an altered spool that I came across on Pinterest a couple of months ago.  Many of the elements are the same as what I used on my Pity Party project and atc swap for the event, just adapted a little differently to go on a spool.

Suzannes2This is my instruction sheet that goes with the project:

  1. Put small dabs of glue on the flowers (Prima) and leaves and place the flowers and leaves into a tidy tray. Add bubble beads where desired and then sprinkle bead mixture over all exposed glue and let sit to dry. Return the excess beads to the jar.
  1. Use the ATG tape gun to adhere the script circles in the middle of the brown lace papers. (Glue is too wet and may cause it to warp.)
  1. Remove just one tape liner on the music notes paper and center it onto cardboard tube. Wrap it tightly then remove the other liner and press down.
  1. Squeeze a small amount of glue on one end of the tube and center the brown lace paper onto it. Repeat with the other end.
  1. Using the glue “caulk” around the base of the tube to create a thin strip of glue all the way around. Set into tidy tray and sprinkle bead mixture onto it.
  1. Take note of where the “back” is before proceeding. Add the leaf vine once around the tube with little dabs of glue. Trim off extra leaves to use on the top.
  1. Glue the nest in place, add leaves, vine and flowers as desired

pity party project

  1. Add the verse with just a little dab of glue
  1. Stick the bird onto the tube, add flowers, vine and/or twigs to “ground” the bird.

I created this to be a little sweet something to sit on your desk, windowsill or shelf. The basic idea could be adapted to be a hanging ornament or make the top a lid that comes off to put a note inside.

Hugs, Suzanne

You’re A Hoot

Vicki Chow has an amazing relationship with her Cricut!

Vicki ChowDarling paper pieced owls adorn the front of the page as well as a tag that fits into a deep pocket mounted on the front.  The polka dot frame behind the sentiment was covered with O’So Sticky Tape before laying the words on.  Then it was dipped in clear micro beads (which never show up well in photos).

The Flower Soft wings on the cover owl add soft texture that invites you to see this page with your hands!

Hugs, Suzanne