Showing posts with label swap. Show all posts

Wednesday, August 1, 2012

Vintage Fat Book - Karen Slusher

Karen Slusher’s vintage page was created to be a label of her very own brew of hard cider. 

VintageFatBook2012KarenSlusher

Her maiden name is Crane and she writes on the back of her page that this was her “Vintage Year”.

Her page has been aged and antiqued and has copper crackle ink and embossed accents.  With micro beads, of course!

VintageFatBook2012KarenSlusher2

And that’s the last of our Vintage Fat Book pages!  I’m always so honored to swap art with the ladies of the Pennywise Arts Yahoo Group – they are a fun and talented bunch!

Hugs, Suzanne

Tuesday, July 31, 2012

Vintage Fat Book – Sally Luna

Sally Luna used a vintage car, clothes and architecture for her “Fine As Vintage…” fat book page design.

VintageFatBook2012SallyLuna

Sally stamped two of each of her images with Stampin' UP! Going Grey ink and colored them with chalks.  (Did you know that the ink takes on the color of the chalk you use to color?) 

One of each image was cut out and layered up on foam tape and a micro bead waist band added to the woman’s dress.VintageFatBook2012SallyLuna2

Sally had a unique request that her page be “last” in the book.  That was so she could add the black ribbon tie and special monogrammed charms for each participant.  She used SU! new alphabet die cut to make the initials, cutting them from paper that had O’So Sticky Tape placed onto it.

Such a lovely finishing touch!

 VintageFatBookInitialsForEachPlayer2012

Hugs, Suzanne

Monday, July 30, 2012

Vintage Fat Book – Kathy Fabre

Kathi Fabre’s page says, “Je adore la vin”.  And I adore her page!

VintageFatBook2012KathyFabre

The hand painted hair features, stickles eccents and the three dimensional grapes are really fun!    Up close you can see that they must have sparkling wine because of the “bubbly” microbeadness.  (wink)

VintageFatBook2012KathyFabre2

Hugs, Suzanne

Thursday, July 26, 2012

Vintage Fat Book - Kathi Hall

VintageFatBook2012KathiHall

Kathi Hall’s vintage page began with an elegant napkin background that was applied with photo mount spray.

Over that she layered a cork patterned scrapbook paper with faux writing printed onto it and a vintage stamped image of a woman's face on vellum over the top of the same image stamped on a linen paper.  Stamping it twice like this really gave the image depth and dimension.  Kathi tore the edges of her image layers to add even more texture.

Next she applied 1” O'So Sticky Tape  along bottom of her page.  On the O’So Kathi added a bright  fuchsia colored glitter flower tape and then dipped it in to green micro beads.  Lace was draped across a corner and the final touches of flowers, ribbon and pearl halves completed Kathi’s design.VintageFatBook2012KathiHall2

There are so many ways to use this technique!  Think about pretty strips of lace or ribbon you may have.  Border punches and pretty paper can also make fun strips of things to lay onto the O’So Sticky Tape. 

Hugs, Suzanne

Wednesday, July 25, 2012

Vintage Fat Book – Kelli Green

VintageFatBook2012KellyGreen

Kelli Green started her vintage page with a free image she found online from Googling “corset”. (The two women)  The smaller image is part of a collage sheet from Alteredpages.com.

Kelly added micro bead accents with spots of clear drying glue around the edges of the corset.VintageFatBook2012KellyGreen2

This technique is one of my favorite ways of getting just a spot of texture onto a project.

Hugs, Suzanne

Tuesday, July 24, 2012

Vintage Fat Book – Lisa Perez

Lisa started out her page by putting a 2” strip of O’So Sticky Tape on the right side of the vintage tag.  Then she inked up the rest of the background with a shimmery Brilliance Pearlescent Poppy ink .VintageFatBook2012LisaPerez

Off to the left of her page, Lisa added a flower she created using her  Tim Holtz Tattered Florals Bigz die.  She used four different fabrics for the flower.

Next she removed the top layer of red liner tape and applied the ribbons in a ruffled fashion.  The pearl bead came next and then she filled the rest of the tape  in with Pennywise Arts clear micro beads. VintageFatBook2012LisaPerez2

The dress form is a stamp from Lost & Found’s 2 Blush “Princess” stamp set.  It’s such a pretty stamp I had to look for it online!

lost and found 2 stamps blush princess 

Hugs, Suzanne

Sunday, July 22, 2012

Vintage Fat Book – Sherry Schauble

Sherry’s stamp collage page is full of color and texture.VintageFatBook2012SherrySchauble

She used postage stamps purchased from Viva Las Vegas stamps and Modge Podged them on to the Maya Road chipboard shape.  Then she stamped the "stamp" images and colored them with colored pencils and a water pen. 

Sherry put clear glue on different areas of the stamped images and adhered the micro beads that way.

VintageFatBook2012SherrySchauble2

Buttons were used as "pop dots" to get different heights for the stamped images.  (Brilliant Sherry!)  A few colorful buttons finished off the design.

Hugs, Suzanne

Friday, July 20, 2012

Vintage Fat Book Swap

Our Pennywise Arts 3rd quarter fat book swap is complete!  With so many different interpretations of “vintage” our book of eight pages from eight players is truly a unique piece of collaborative art.  This is what it looks like all bound together:

Vintage Fatbook 2012

The top page of each book is the page that player created.  This helps me keep it all straight when I’m ready to package and mail the books back.

Each base is a pre cut chipboard shape from Maya Road.  I was inspired by papers from Prima Marketing’s “Almanac Collection”.  This is my page:

VintageFatBook2012SuzanneGlazier

I painted my bases white and then rubbed them lightly with Distress Ink. (Maybe Frayed Burlap?)  The background was stamped with a fabulous handwriting sampler from an old Dream Impressions set.

A piece of patterned paper was embossed with a Cuttlebug die and the raised parts were rubbed with the same Distress Ink.

The butterflies and nest have multiple layers to make my page “fat”.  Foam tape keeps the wings in flight and the small butterfly has been covered with O’So Sticky Tape and clear ultra fine micro beads from Pennywise Arts.

I’ll show a close up tomorrow.  This post ended getting too long because I went into the whole process of mixing beads from my edges and decided that would be better as a separate post.

Every day for the next week I will feature the other pages in this fabulous book so keep coming back!

Hugs, Suzanne

Sunday, April 29, 2012

You’re A Hoot

Vicki Chow has an amazing relationship with her Cricut!

Vicki ChowDarling paper pieced owls adorn the front of the page as well as a tag that fits into a deep pocket mounted on the front.  The polka dot frame behind the sentiment was covered with O’So Sticky Tape before laying the words on.  Then it was dipped in clear micro beads (which never show up well in photos).

The Flower Soft wings on the cover owl add soft texture that invites you to see this page with your hands!

Hugs, Suzanne

Saturday, April 28, 2012

It’s Owl Good

Wine Bottle BlingMy owl was totally inspired by a blingy wine bottle wrap!  My friend Sandy was going through her stash ‘o stuff  and decided that I needed to have about a dozen of them. (?? Ü)

When I sat down to begin my owl design there they were, in a pile on my table just waiting to be: disassembled!

Using jewelry pliers I opened up the jump rings to take it apart and created “skirts” to go around my owl’s waistline, or is that a neckline?

I used some of the glitzy circles from the wrap to create the eye lids and lashes for my owls.  And then there are large 3-D Zots on the eye balls with a fun mixture of micro beads stuck to them.

Suzanne Glazier

I love how the beaded Zots stay “skooshy”.  They remind me of the old time candies my grandma used to keep in her candy bowl.  I didn’t like to eat them but I did like to “skoosh” them.  Ü

The scalloped lace feathers were cut with my Cricut.  The stamp is a Studio G from the dollar bin at the craft store.

Oh, and back to the wine,….. if you look closely you can see from the label that it came from the Pennywise vineyard in California.  For reals!  I ordered a few bottles to share at the Pennywise retreat this weekend, Cheers!

Wine Label

Hugs, Suzanne

Friday, April 27, 2012

I Give A Hoot

Sherry Schauble’s fun-ky owl really gives a hoot! 

Sherry SchaubleLove the bright colors and sparkle of the background paper and the floral eyes.  On the back Sherry fibered and micro beaded the whole thing.

Sherry Schauble back Hugs, Suzanne

Thursday, April 26, 2012

Take Only Memories

This pretty owl was created by Lisa Perez:

Lisa Perez Baby bottle caps with teal micro beads make for beadi-ful eyes!  And the flowers folded over to create the back feathers are just too cute!

Lisa Perez back

Hugs, Suzanne

Wednesday, April 25, 2012

Fun and Funky Hooter

Kelli Green included so many creative elements it’s hard to keep track of them all!

Kelli Green

Layers and layers of papers have been decoupaged onto the chipboard base to create a fun background.

A small clothespin separated into two pieces is stamped and placed as eyebrows.  Buttons are layered for eyes and an upside down heart shaped button is the beak.  Cute little mushroom’s are placed inside tiny bottle caps for the feet and a micro bead strip around the belly just adds to all the texture.

On the back layer Kelli has foil embossed (MORE texture!) an owl with amazing detail!

Kelli Green back

Hugs, Suzanne

Tuesday, April 24, 2012

Love Your Hooters

This take on the Pennywise Arts “What A Hoot” fat book swap by Kathy Fabre was quite clever and unexpected!Kathy FabreThe front sports a sassy gal reminding you to “Love your Hooters”, on the back is a reminder to “Feel Them Often” with a breast cancer ribbon.  The pink rat tail cord finishes off the edges so nicely.

Look closely and you can see inside her blouse, where Kathy has cleverly placed a unique hand shaped charm.  Ü

Kathy Fabre Close


What a fun take on the theme, and a very important reminder!

Hugs, Suzanne

Monday, April 23, 2012

Fly Away With Me

The second player in the Pennywise Arts “What A Hoot” fat book swap is Kathi Hall:

Kathi HallThe base layer of Kathi’s owl is that fabulous brown honeycomb paper sometimes used as packing material.  It really makes the perfect owl feathers!

Layered papers (some mounted on foam tape) give the eyes a real lift.  The micro bead eyebrows are super cute and simple!

Hugs, Suzanne

Sunday, April 22, 2012

What A Hoot!

Over on the Pennywise Arts Yahoo community we just finished up a fun owl shaped fat book swap and what a “hoot” it has been!

First up is Karen Slusher’s  fanciful owl:

Karen SlusherSporting layered flowers with gems for eyes, beaded trim “feet”, a heart shaped micro beaded beak and heart shaped micro beaded wings. 

While the wings are really clever and adorable, the pink feathered ears are really my favorite feature!  Ü

Hugs, Suzanne

Friday, April 6, 2012

Another Dose Of Pity

I’m throwing in another dose of pity for those that can’t join us for the annual Pennywise Arts retreat.  This is my project for the Pity Party swap hosted on the PWA Yahoo Group.

Suzanne Glazier Pity Party Sometimes when I have too much time to ponder a project, I end up getting in much deeper than I would if I had waited until the last minute.  This was one of those times.

From bottom to top the layers are brown cardstock, olive cardstock, a distressed file folder inked with a music stamped background (unknown company – unmounted stamp).

The brown daisy shaped doily is an SVG file that my dear hubby created for me just for this purpose.  (I’ll gladly share the file in SVG or SCAL if you email me!)  I covered the doilies with mixed brown and black embossing power.  While the embossing powder was still warm and melty I sprinkled on a mixture of yellow, brown and  gold micro beads. Then a little more gentle heat was added to set them.

The nests and the eggs took the longest to fabricate.  The nests were made from two different fibers wound together around my fingers and kinda lassoed together.  The brown fibers were very hairy so the nests all had haircuts.  Ü  The eggs are little bits of polymer clay, baked and speckled with blue and brown acrylic paints.  Each nest was glued to a branch and then layered onto the card.

The final touch was the momma bird, the leafy ribbon from May Arts and some paper flowers that came in a jar.

Using all of the same supplies and inspiration I created a variation of this card for the retreat exclusive Flight of Fancy atc swap.   My retreat shoebox project uses all the same items and has a third dimension to it.  Can’t reveal that for 24 more days!  Ü

Hugs, Suzanne

* The bird stamp is from Stampers Anonymous and the sentiment is from Studio G.

Tuesday, April 3, 2012

Annual PWA Pity Party Swap

Julie Imsland Pity Party Card

Every spring Pennywise Arts hosts a weekend long “shoebox party” retreat.  All of the guests bring one project (in a proverbial shoebox) with enough supplies for everyone else to make it.  By the end of the weekend we will each go home with at least 27 new finished projects!  The crafty bits are just a part of the wild and wacky fun our group of gals cooks up over the weekend.  Truly, you have to see it for yourself to even believe a word I say.   What happens at a PWA retreat stays at a PWA retreat. (wink-wink)

And, every year there are many in our online community that wish they could come play with us and can’t.  It is in honor of them that we host our annual “Pity Party” swap.  A “shoebox party” in the mail with project packets to create.  This year our hostess is Sherry Shauble.  Sherry should have received all 18 of the packages by now and will be sending out the swapped kits very soon!  One of those kits belongs to Julie Imsland.  Since Julie and I are neighbors and get together often, I got a sneak peek at her card kits.

Julie Imsland Pity Party Card

Behind the black lattice die cut paper Julie put a strip of O’So Sticky Tape.  Then she filled in the gaps with Pennywise Ultra Fine Clear Beads.  Julie’s card is a plethora of layers and texture!

It’s a busy month getting ready for retreat, so as I have time and can squeeze them in, I will be posting pictures of the other Pity Party projects!

Hugs, Suzanne

Monday, January 16, 2012

Steampunk Time Bandit

Time Bandit

From “time to time” we have chunky atc swaps on our PWA Yahoo group and it’s always so much fun to create a special one of a kind piece of art to share.  This time I was paired up with my friend Lisa.  It was great to give it to her in person and watch her reaction!  For Lisa’s chunky I covered a wooden block with some old time wrapping paper.  Then I distressed it with a brown ink pad.

The head is made from a large watch piece with the inside gears still in tact and turning.  The hands on the back of the block also move freely.  It has a black micro bead sash and a brooch from a craft store.  The arms are mismatched cabinet knobs that move back and forth and up and down.  My favorite feature is the feet.  Made of clock gears that have been inset together, if you turn one it turns the other.  It’s a neat interactive piece!

Turning Cog Feet Time Bandit Side View

Hmmmm, I think I need to make another for myself!  Ü

Hugs, Suzanne

Thursday, December 22, 2011

Creative Ways To Hang A Domino

It’s always fun to see the ideas that others come up with for hanging dominos.  Here are some from the PWA domino swap (and a couple creative ones from past years).

A fancy bead glued to the top.bead

A bead made from rolling clay and poking a straw through it to create the hole.

Clay Bead

Pre drilled dominoes from Pennywise Arts.

drilled

An ornament hook glued to the back.

 karenshook

An eye hook screwed into the top.

Kathisdom

Ribbon wrapped tightly around the edges and then cinched up through the center of a flat bead.  The ribbon is then knotted to hold fast.

 Kathysdom Kathysdom2

A bead glued to the top.

Kellisdom

Several pony beads glued to the top (side) edge.

Lorisdom

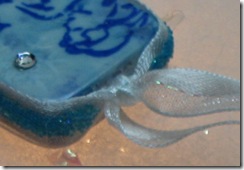
Ribbon wrapped and tied tightly at the top with a knot.
ribbon

A band of beaded O’So Sticky on the sides (glue was added so the cord wouldn’t slip out.)

Sandysdom

A heart shaped clip bent so the bottom sticks up for a hook to attach to.

Wire Clipiolas

Wire poked through the holes and twisted back on itself.

wire

When adding things to the top to use for hangers, be sure to use a super strong glue like epoxy, E6000 or Jewel Tac.  It needs to be able to hold the heavy weight of a domino and not all glues are strong enough.

Hugs!  Suzanne