Tuesday, July 13, 2010

Happiness is…

Happiness is Jennifer Toussaint’s pretty picket fence wall hanging!  So bright and cheery, it definitely makes me feel happy when I see it.  Happiness

Jennifer found most of her materials in her craft stash – I bet you probably have most of them already (or something similar)  too!

Materials:

Micro beads from Pennywise Arts in stream, lettuce, gold and iridescent colors.

Wooden picket fence with 2 flowers pre-attached

2 chipboard butterflies

2 large pop dots

12 inches gingham ribbon in blue and white

Happiness or other sentiment stamp

Cardstock scraps in white, pink and green

Opaque glitter

Acrylic paints in lavender, light blue, pink, yellow, white and light green

Crackle effect liquid

2 small gemstones for butterflies and one large gemstone for flower center

Stickles purple glitter glue

Directions:

Paint picket fence with white paint. Let dry and then cover in crackle finish. Paint flowers with pink and blue and then the stems and leaves with green. Cover flowers in coordinating micro beads in stream, lettuce, bubble and gold. Place yellow gem stone in middle of blue flower with crystal effects. Stamp phrase onto white cardstock. Trim around word or phrase. Back this white piece with pink cardstock and then green and white scrapping paper. Adhere to fence with adhesive tape. Cover butterfly chipboard pieces in lavender acrylic paint. Let dry and then cover in opaque glitter. Draw a line with Stickles purple glitter glue down the middle for the body. Then adhere small gemstones for the head of the butterfly. Attach with pop dots. Thread ribbon through holes for hanging.

Friday, July 9, 2010

Relaxing Bubbles

When was the last time you took a bubble bath?  Gosh, it’s only a faded memory for me!  Stephanie Loomis’s bubble bath card is overflowing with our Iridescent Bubble Beads and isn’t it just the cutest??

Stephanie Relax

In our fast paced lives, I think it’s as important as ever for us to remember to relax and pamper ourselves.  I wonder how many bubble baths Steph will inspire this week??


Stamp Credit: The Angel Company

Tuesday, July 6, 2010

Love Inside

It is such a treat to share amazing artwork with you from our design team each week!  They are an inspirational group of gals that inspire me over and over again.  I always look forward to what surprises will arrive in the mail.  Ü

This decorated tin by Jennifer Toussaint really got me drooling (and I’m sure it has nothing to do with the dark chocolate she sent with it… Naw, nothing.) Box Of Love Clip

In addition to being a very busy wife and mother, Jennifer is a faithful member of our Yahoo Community.  She assists as an administrator, participates in many of our swaps and designs incredible art like this to share!  

The luscious Hershey’s Kisses I mean, luscious alcohol ink colors that Jenn selected for this project really got things off to a great start!

Box of Love

Materials list:

(Recycled) Calypso poinsettia paper flower tin

Adirondack alcohol inks in Citrus and Stream

Cardstock bits from Stampin’ up

Music sheet paper

Assorted crushed bead bits

Watch pieces

Crystal Effects

O’So Sticky Tape from Pennywise Arts

Paper flowers from LTD catalog

Copper charm from Beyond Beautiful

Glue dots

Adhesive

Peeled paint stamp from All night media

Versa Mark ink pad

Micro beads from Pennywise Arts: Copper and Lettuce

General directions:

Using Adirondack felt and stamper to randomly stamp alcohol inks all over metal portion of tin and lid. Dry completely. Wrap a long piece of O'so Sticky Tape all the way around tin and cover with mixture of the copper and lettuce colored beads. Rip up random scraps of cardstock, and stamp a lighter piece of cardstock with peeled paint stamp using Versamark. Dry completely. Rip up pieces of sheet music. Use adhesive to apply the random scraps of paper on the front of the tin. Use adhesive to apply flower pieces randomly. Use glue dots to apply copper charm to the front. Use Crystal Effects to apply crushed bead bits and watch pieces to front.  Here’s a blown up of the close up – Yum-O!

Box Of Love Clip

Next cut a large circle of O’So Sticky Tape to cover the circle of see-through plastic on the lid of the tin. Peel back paper and apply bead mixture to the top of the lid completely.

Box of Love 3

I can’t think of a better way to “go green” than with this lovely green tin and the use of so many recycled materials!  Way to go Jenn!

Box of Love 2

If you like this project you’ll surely want to check back here next week for more!

You can also find Jennifer sharing on her blog too: http://craftychickfrommaine.blogspot.com/

Tuesday, June 29, 2010

Butterfly Art Book

Art Butterfly Book Cover

Perfect for a day when you just want to sit and make something, this butterfly book by Jean Sunderman is full of easy samples of collage art.  The finished book is an inspiration to collagists everywhere!

Materials Jean Used:

Gold Opaque, Orange Translucent, Green Opaque and Clear Micro beads from Pennywise Arts

Winged Things I and II Collage Sheets from Pennywise Arts

O’ So Sticky Tape and Sheets from Pennywise Arts

Butterfly Chipboard Book: Michaels  (For the SVG file of this butterfly just email me suzanne@pennywisearts.com !)

Paper: DCWV Once Upon A Time

Embellishments: Flowers, Scrabble Letters, Crowns, Pearls and Faux String of Pearls, Brads

Gold Leaf Paint Pen

Vintage Photo Distress Ink

Embossing powder


Once you’ve assembled your supplies, put on some good music and get going!  You’ll be surprised how quickly you can complete something if you have everything you need at your fingertips!

Here’s the rest of Jean’s book…

 Page 2

 Page 3

Here’s a great close up of one of Jean’s angels with beaded wings:

Page 3 Close

Jean Butterfly 4 cutPage 5 

If you need more direction, here you go:

Cover front and back of each butterfly with patterned papers. Be sure and punch whole after each side for metal ring.

Edge all pieces with gold paint pen.

Cut out various Winged Things and edge with Distress Inks. Add O’So Sticky Tape to various wings and areas on each collage piece.

Dip brads in embossing powder while still warm, stick in beads to create centers for flowers. Add Scrabble letters to cover and decorate each page as desired.

On last page decorate with letters to spell “art” and add collage sheet quote.


Thanks so much Jean!

Friday, June 25, 2010

Gentle

Jean ATC

Just a quiet little reminder to be gentle with yourself today.  Take time to breathe, center, rest, quiet, calm.  Yes.  You.  Are. Worth. It.  Ü


ATC by Jean Sunderman

Tuesday, June 22, 2010

“Just A Note” From Jean

Jean Just Flower Closeup bLet Jean inspire you with another one of her fresh and fun floral designs!

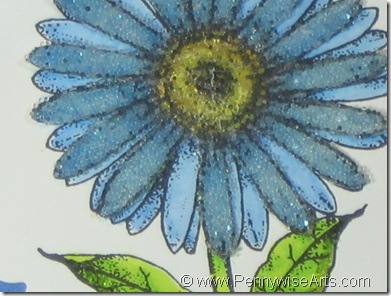
In this tutorial Jean beads just some of the flower petals to create the multi dimensional Gerbera Daisy shown above.  Below are her easy to follow step by step instructions.

  Jean Just A Note

Materials:

Clear and Lettuce Green micro beads

O’So Sticky Tape Sheet

Stamps: Li’l Davis Designs, The Angel Company

Scallop Circle Nestabilities

Tuxedo Black Ink

Cardstock: Stampin’ Up!

Patterned Papers: K & Company

Pink Sheer Ribbon

Metal Tag

Glue Pen

Copic Markers: B21 Baby Blue, B24 Sky, YG23 New Leaf, YG25 Celadon Green

Directions:

Finished Card size is 5 ½ x 5 ½. Cut patterned paper slightly smaller. Attach to card front.

Cut a scallop circle in white and a size bigger in blue. Stamp the white piece with a Gerbera Daisy. Color with Copics. Stamp the daisy again on a white scrap piece. Color only the flower and cover with O’So Sticky Tape sheet. Cut out flower from sticky sheet removing some of the petals. (This allows the other flower to show through)

Cover Completely with clear beads. Bend petals slightly and attach over full daisy.

Use a glue pen on bottom part of leaves and cover with lettuce colored beads. Let dry. Attach flower circle to blue circle and to front of card.

Add a pink ribbon and stamped metal tag.

Love Jean’s style?  Follow her on Blogspot!
www.artsyj.blogspot.com

Thursday, June 17, 2010

Silent Beauty

It still feels like “April Showers” here in the Snoqualmie Valley and that means I am still waiting for my potted flowers to really make their magic.  Thankfully I had this card from PWA designer Jean Sunderman to brighten a rainy day!

Jean’s creative floral centers made from mico beads and masks really make magic happen on this card:

Jean Silent Beauty

Silent Beauty by Jean Sunderman

Materials:

Micro beads: Copper Opaque, Silver, Dark Rose Opaque, Light Green Opaque, Gold

Cardstock: Orange, Green and White- Stampin’ Up!

Stamp: Li’l Davis Designs

Brilliance Inks: Lime and Yellow

Colorbox Chalk Ink: Pansy, Green and Tangerine

Bottle Caps

O’So Sticky Tape Sheets

1” Circle Punch

Plastic stencil of flower


Once you have it all together, here’s the how to:

Directions:

Create a card to fit a regular business size envelope. Card should measure 9 x 4 or so.

Cut patterned paper ¼ inch smaller. Mount to green cardstock and trim. Attach to front of card.

Jean has a clever way to create a perfect shadow image from just one unmounted stamp!  Here’s what she does: 

Attach the clear stamp to block the stamp face down on the block (flipped over from “normal”.   Now use the back of the stamp to create a “shadow” on white cardstock. Clean off and attach stamp the correct way with the stamp face up. Stamp in a darker or coordinating color to create the outlines of the design.

Stamp three flowers and cut out as shown.

Flatten 3 bottle caps. Remove any rubber on the inside. Punch out three 1 inch circles of the O’So Sticky Tape Sheet. Stick to the inside of each bottle cap. Peel off backing and lay flower stencil on the sticky sheet. Cover with beads. Remove stencil and cover the rest with another color.

Attach all bottle caps to flower centers. Add flowers to front of card with one flower raised with 3D foam tape. 

Here’s a close up of one flower that shows the neat contrast inside the bottle cap:

Jean Bottlecap Flower Close Up 

To finish the card stamp a quote on white cardstock. Mount to orange cardstock and trim. Add to card front. Stamp a small flower, add beads to center and attach with 3D foam tape.

Be sure to visit Jean’s blog where you can see even more of her artwork:  www.artsyj.blogspot.com