Showing posts with label christmas. Show all posts

Friday, December 23, 2011

New Glass Slide Ornaments

Playing around in my craft room this week I created some new glass slide ornaments from our Christmas collage sheets.  I played with different hangers based on ideas from the domino swap as well as the wire wrapping I did on the “Over the river” atc posted on Tuesday of this week.

Glass Slides

Left: I cut the ornament hangers into two pieces and wedged the ends between the images that are sandwhiched between the slides.  Plastic slides worked best for putting lumping things inside because they will bend just a little.

Center:  The hanger is created from a piece of 1/4” O’So wrapped over the top from front to back.  Each end touches the glass for a stronger bond.  Bead the inside of the loop before removing the liner to bead the outside.

Right:  Still not a perfected technique but I do like the wire wrapping with the beads that move back and forth.  Getting the loop to land in the middle at the top was harder than I thought it would be, but I don’t have a lot of wire work under my belt yet.

It’s definitely not to late to whip up a few of these yourself!  They take only minutes to do.  Purchase digital collage sheets from our website, print and cut out.  Place between two slides (glass or plastic) then wrap with 1/4” O’So around the edges and fold the excess tape to the front and back to make a frame.  Press into micro beads and you’re done.

Hugs and Happy Beading!   Suzanne

Tuesday, December 20, 2011

Snowman Party Favor

I’m hurrying to squeeze in all of the fun things I’ve been working on for Christmas, in case you need easy last minute ideas!

Look at this adorable snowman candy bar dressed up in a sheet of white printer paper and embellished with things you probably already have on hand:  gems, paper, paint, felt.  Do one in just 10 minutes or so or set up a production line and make 10 in under and hour.Snowmanfavor He looks very similar to Laura Davis’s domino ornament!  I think my snowman needs a bank of micro beads snow along the bottom too!

Laurasdom

Hugs and Happy Holidays, Suzanne

To Grandmother’s House We Go

riveratc

This is one of my all time favorite holiday atcs.  It was simple to make and still makes a really bold statement.

Torn papers are layered to create the base.  Then I cut hearts from O’So Sticky Tape placed onto red cardstock.  The hearts are beaded with red opaque micro beads and added to the card with foam tape.

A few loose seed beads were strung onto wire which was then wrapped around the atc 3 times.  The ends of the wire were curled forward and the whole thing was layered onto a piece of coordinating cardstock to hide the wire in the back.

The stamp I used is from My Sentiments Exactly.  I loved singing that song as a child so that’s what drew me to it.  Ü

A double slit punch was used to make the holes for weaving the ribbon through.  I like this method because it lays flatter than a bow and looks just as nice.

Hugs, Suzanne

Friday, December 9, 2011

Sparkly Lighted Ornaments

Pennywise Arts is sponsoring the month of December on Gingersnap Creations and many PWA artists will be featured there.  Yesterday  on Gingersnap Creations our very own Michele Aiello-Zendejas shared some stunning beaded ornaments with an easy step by step tutorial so you can make them too!

PWAStarryNightTrio1
Supplies:

Instructions for the 3-Sided (Triangle) Ornament:

PWAStarryNightTrio3Slide
1. Cut out the three images that you want to use from the Swing Shift Designs Christmas Slide Soup Collage Sheet, Designed by Michele Aiello-Zendejas exclusively for Pennywise Arts. I used the two of the Three Kings slides and the Star of Bethlehem for this ornament.
2. Adhere the slides to the back of the images. Note: You won't see the slides, they are used for support only. You could use chipboard or very heavy cardstock instead of slides for the 3-sided slide ornament, but not for the 4- or 5-sided slide ornament. The 4- and 5-slide ornaments are lighted, so the support has to be transparent.
3. Peel one side of the backing off of a sheet/piece of O'So Sticky Tape. Lay the three slides face down onto the exposed adhesive. Leave a very small space, 2mm or the thickness of your slides, between the slides so you can fold the sheet with the microscope slides stuck to it into a triangle shape later.
4. The three slides are now held together by the O'So Sticky tape that you added in step 3. Trim the excess tape off around the outer slides. DO NOT cut between the three slides or separate them.
5. Peel off the rest of the backing, then dip the front side of the attached slides into a 50/50 mixture of Pennywise Arts Ultra Fine Micro Beads and Pennywise Arts Mini Micro Beads.
6. Place a piece of single side heavy duty tape on the back along one side of the attached slides and then carefully fold the three slides into a triangle shape. Use a chopstick to reach inside of the triangle and press the tape onto the back of the slides to secure them.
7. Run a piece 1/4” width piece of O'So Sticky Tape around the top and bottom of the ornament. Remove the protective liner and then dip it into the PWA bubble beads and then into a 50/50 mixture of PWA's Ultra Fine Micro Beads and PWA's Mini Micro Beads.
8. Attach 1 piece of 3” long wire to the inside (approximated ¼ to 1/2” in) at the top and bottom of each slide with hot glue.
9. Gather the three wires on the bottom and slide the beads on from large to small. Then bend the excess wire into a curl or scroll. Gather the three wires at the top and slide the beads on from large to small. Twist the wires together and bend into a loop. Add a hook and hang it on your tree!

Instructions for the 4-Sided (Quadrilateral/Square) Lighted Ornament:
PWAStarryNightTrio4Slide

1. Cut out the four images that you want to use from the Swing Shift Designs Christmas Slide Soup Collage Sheet, Designed by Michele Aiello-Zendejas exclusively for Pennywise Arts. I used all three of the Three Kings slide images and the Star of Bethlehem slide image for this ornament.
2. Adhere the microscope slides to the back of the images with O'So Sticky Tape.
3. Adhere O'So Sticky Tape to the front of each image. Remove the protective liner and then dip it into a 50/50 mixture of PWA's Ultra Fine Micro Beads and PWA's Mini Micro Beads.
4. Cut a hole out of the center of a small square Shake It Shaker Card Window large enough for the Battery Operated Tea Light Candle to fit through. This will be the base.
5. Measure around the Battery Operated Tea Light Candle, then add ¼ to 1/2” for overlap. Cut a piece of Transparent Film to the length you just measured by 3” tall. Roll it into a tube and secure with clear tape. It should fit easily around the Battery Operated Tea Light Candle. Attach the clear tube to the bottom Shake It square with clear tape. Insert the Battery Operated Tea Light Candle from the hole in the bottom and secure it with clear removable tape. Do not glue it in. You want to be able to remove it so you can change it out when the battery goes dead.
6. Apply O'So Sticky Tape to the top part of the base piece. Remove the liner. Place a 1/4” strip of O'So Sticky Tape down the center of each slide. Remove the protective liner from the tape and attach the four image slides evenly spaced around the clear tube. The slides should now be connected to the tube and to the base, one on each side of the base.
7. Use another small square Shake It Shaker Card Window for the top of this project. Secure it to the top of the four image slides with thin strips of O'So Sticky Tape.
8. Cover the top Shake It Shaker Card Window with O'So Sticky Tape. Remove the liner to expose the tape.
9. Add some beads, small to large, onto a head pin. Bend and trim the excess wire from the head pin and then attach it to the top of the project. It should be centered on top of the Shake It Shaker Card Window.
10. Attach four acrylic flowers to the base, and four flowers around the beaded head pin on the top of the project.
11. Dip the exposed tape on the top and base into the PWA bubble beads and then into a 50/50 mixture of PWA's Ultra Fine Micro Beads and PWA's Mini Micro Beads.

Instructions for the 5-Sided (Pentagon) Lighted Ornament:

PWAStarryNightTrio5Slide 

1. Cut out the five images that you want to use from the Swing Shift Designs Christmas Slide Soup Collage Sheet, Designed by Michele Aiello-Zendejas exclusively for Pennywise Arts. I used all three of the Three Kings slide images and two of the Star of Bethlehem slide images for this ornament. Set one Star of Bethlehem slide images aside. Punch a few tiny stars out of each of The Kings slides and one of the Star of Bethlehem Slides, then punch out a few 1/16” circles in all five slides. Now punch a small star out of the center of of the Star of Bethlehem slide image that you set aside. Punch out a few 1/16” circles from this slide as well.
2. Adhere the microscope slides to the back of the images using O'So Sticky Tape. Note: The microscope slides are used for support. The 5 sided slide ornament is lighted, so the support has to be transparent.
3. Peel one side of the backing off of a sheet/piece of O'So Sticky Tape. Lay the five microscope slides face down onto the exposed adhesive. Leave a very small space, 2mm or the thickness of your microscope slides, between the microscope slides so you can fold the sheet with the microscope slides stuck to it into a pentagon shape later.
4. The five microscope slides are now held together by the O'So Sticky tape that you added in step 3. Trim the excess tape off around the outer microscope slides. DO NOT cut between the five microscope slides or separate them.
5. Peel off the rest of the backing, then dip the front side of the attached microscope slides into a 50/50 mixture of Pennywise Arts Ultra Fine Micro Beads and Pennywise Arts Mini Micro Beads.
6. Place a piece of single side heavy duty tape on the back along one side of the attached microscope slides and then carefully fold the five microscope slides into a pentagon shape. Use a chopstick to reach inside of the pentagon and press the tape onto the back of the adjoining microscope slide to secure it.
7. Punch or cut a 2” circle (or larger, depending on the thickness of your microscope slides) from the Clear Transparent Film. Use the 5 sided ornament as a template and place a dot where the 5 corners meet, all the way around the circle.
8. Cover both sides of the 2” circle with O'So Sticky Tape. Punch a 1/16” inch hole into the center of the circle. Thread a head pin through the hole you just punched. Place a small piece of tape on the head of the head pin to secure it to the circle. Remove the bottom layer of protective backing from the tape and adhere the circle to the top of the 5 sided ornament, fold the tape down onto the sides of the ornament.
9. Remove the protective liner from the tape. Thread the faceted beads, from large to small, onto the head pin. Bend the head pin into a hook shape. Place 5 acrylic flowers around the newly beaded head pin. Then dip it into the PWA bubble beads and then into a 50/50 mixture of PWA's Ultra Fine Micro Beads and PWA's Mini Micro Beads.
10. Run a piece 1/4” width piece of O'So Sticky Tape around the top and bottom of the ornament. Remove the protective liner and then dip it into the PWA bubble beads and then into a 50/50 mixture of PWA's Ultra Fine Micro Beads and PWA's Mini Micro Beads.
11. Place a Battery-Operated Tea Light Candle inside the bottom of the ornament. The battery should fit snugly. If your battery operated candle falls out, use a few small pieces of clear transparent film as a shim to keep it inside the ornament. Do not glue it in. You want to be able to remove it so you can change it out when the battery goes dead.

PWAStarryNightTrio5SlideLightsOn
Reminder: never leave anything producing heat unattended.
Thanks Michele for sharing your amazing talent and inspiring us with your creative ideas!

Hugs, Suzanne

Sweet Family Photo Ornament

DotAornament


Vintage family photos make wonderful keepsake ornaments! 

For this one Dot Alcorn started with a round chipboard base.  The photo was then layered on and the mixture of black, white and silver micro beads were added to the edges with O'So Sticky Tape.

My friend Kathi Hall told me about another fun ornament base – canning lids!  They have darling red and white checked ones available that make wonderful Christmas ornament bases.  red-gingham-jam-jar-lid-63mm

Place a family photo on the plain side and make a “To” and “From” signature on the gingham side with a Sharpie marker.

A Crop-A-Dile tool easily punches holes through the lid for the ribbon to thread through.

cropadile

Oh! These ornaments could also be used as the gift tag on a present!

So many ideas, so little time!


Hugs, Suzanne

Thursday, December 8, 2011

Holiday Mice Tin

Another fun creation from Dot Alcorn is this cute gift tin.DotATinoutside 

The outside uses an adorable mouse image from our "Christmas 5" collage sheet. 

Dot covered the lid with O’So Sticky Tape then placed the image in the middle.  Gold micro beads filled in the edges to create the border. 


Inside the tin Dot glued paper, embellishments and pearls.  While the glue was still wet she sprinkled micro beads on for an icy effect.

DotATininside

I think decorated tins would make a great presentation for gift cards!


Hugs, Suzanne


Wednesday, December 22, 2010

Gift Card Holders

If you follow the Pennywise blog regularly you might recall these AOL cd boxes that were in desperate need of alteration:

aol boxes I’d collected a substantial amount of them years ago when they could be found on the counter at the post office free for the taking (and taking, and taking).  Even just two at a time, they added up quickly when you consider that back then I went to the post office five days a week.  Best of all, these very unique boxes are made of WOOD!

On the first weekend of December, I sat down with four Stampin’ Up paper packs, Sure Tac Glue and 28 AOL boxes.  I was determined to have my project as close to completed as possible before the weekend slipped by.

gift card boxes I’m proud to say that I attained my goal and even got a head start on the handmade poinsettia flowers to embellish each one.  (Jolee’s eat your heart out!) 

Poinsettas With a little help from my friend Chriss Grabb, the flowers were finished during several episodes of “White Collar”. Ü

The boxes are even finished on the inside!  (Spellbinders dies made them look so professional!)

Inside Gift Card Boxes

All I had left to do was make the  tags and add the gift cards!  I chose Restaurant.com cards to show my appreciation to the Pennywise Arts Design Team.  I got a great discount on them and I think it’s fun to go hunting for deals at restaurants we haven’t tried yet!  Design Team members, be sure to read the instructions on the back of the card!

Thanks everyone for your input, ideas and feedback.  I look forward to a prosperous 2011 and hope you’ll be right there with me!

Hugs,  Suzanne

Thursday, December 16, 2010

Countin Down The Days

DSCF4227Children all over the world are counting down the days til Santa comes and Michelle McCathy’s grandson Evan is no exception!  His grandma made him an advent calendar with micro bead pizzaz!

Each tin has been beaded and numbered and leave it to Michelle to mix them up all up to make little Evan learn his numbers!  Ü    DSCF4231I’m sure that this lucky kid is having a blast discovering each of the treasures inside!

Hugs,  Suzanne

Saturday, December 11, 2010

More Holiday Ornament Inspirations

On page two of the Pennywise Arts website Art Gallery Stephanie Loomis has some elegant dominoes. Snowflakes are always quick and easy and I love how she has oriented one sideways!
We also have some purse charms (not sure who made them though).

I love the idea of doing some tag ornaments using the ball chain as a hanger. I always save the little chains thats sometimes come on clothing tags (usually my son's jeans) and this would be a neat wayto use/recycle them!
Hugs and Happy Holidays,
Suzanne

Saturday, December 26, 2009

Here Comes Santa Clause!

Oops!  I think I missed this hat in my posting of the fat hats from our swap!

This classic Santa hat was made by CJ Mueller.  Ol’ Saint Nick has been hand stamped and colored and adorned with holly. Ho Ho Ho!

CJ Mueller 1

Friday, December 25, 2009

Julie’s Christmases

Coming up in January, PWA will be spotlighting projects created by designer Julie Imsland.  Julie is a long time “beadie bud” and talented artist hailing from North Bend, WA.  Here are a few of the Christmas cards she has made in past years for our design team…

DT - Julie - Xmas4

Stamp Credits: Paper Inspirations


DT - Julie - Xmas1

Stamp Credits: Rubberstamp Ave.

DT - Julie - Xmas2

Stamp Credits: Rubbermoon

DT - Julie - Xmas3

Tuesday, December 22, 2009

Santa Hat Shaker

Kelli Green used colored plaster to create the amazing texture on this Santa hat.  She crafted a fun shaker card rim with red and clear micro beads over a red snowflake background.  Her hat was finished off with a cluster of holly leaves and berries.

Kelli Green 2

Ho! Ho! Ho!

This festive hat was made by Karen Slusher and comes packed with lots of added details!  A mixture of  micro beads  and 1/4” O’So Sticky Tape stripes add texture to the wallpaper effect in the background.  A three dimensional sticker has been layered and embellished with Stickles and fun red pom poms border the hat’s brim.  Karen also added red stickles to the snowmen bordering the bottom edge to create glittery hearts.  A large pom finishes off the hat and was created from crumpled paper, a silk flower and a fancy brad.

Karen Slusher 1

Holly Jolly Santa Hat

Tracy Mathia 1

Tracy Mathia’s Santa hat has by far the fattest cotton balls I have ever seen!  Her background has lots of texture happening with embossed patterned paper and a glitter embossed “Merry Christmas” over the top of it.  Tracy then added red micro bead holly berries and she used her signature micro bead fabric technique to create the holly from O’So Sticky Tape that has been cut and beaded on both sides. 

Lady Chat Got Plastered!

This self titled fat hat was made by Melissa Ragsdill, also known as Lady Chat in the PWA Yahoo Group.  She used plaster to create the texture of the background which doubled as adhesive to hold a whole lotta clear micro beads to the brim.  A wide sparkly ribbon creates the perfect trim and a really, really fat squishy “something” with a peppermint candy image in the middle is the final, fun touch. 

Melissa Ragsdill

Monday, December 21, 2009

Heartful Snowman

Karen Slusher 2

Karen Slusher added her unique and classic style to the creation of this snowman with hidden features.  Paint and stamps start it all off in the background while hand punched snowflakes and Stickles take the stage to create the face and icicles on the hat.  The arms are ornament hangers and the vest is cut from patterned paper.  Not shown in this photo is the surprise inside when one discovers that the vest actually opens up and underneath is a large crystal snowflake heart!

Snow Angel

Julie Imsland 1 One of two snowmen in the Pennywise Arts fat book swap came from PWA designer Julie Imsland.  Julie was super creative in making her snowman into an angel and here’s how she did it…  The snowman body is covered in three white felt circles which have been aptly adorned with the basic snowman outfit of eyes, nose, scarf and heart.  (Everyone knows that snowmen have hearts!)  To keep her man’s head warm Julie created a hat from an old tube sock (clean of course!)  The wings were made from scalloped chipboard that she found at Michael’s last summer.  She cut each board in half to get the shape shown.  Painted white and run through her Cuttlebug, Julie added embossed snowflake texture to the background of the wings before rubber stamping snowflakes over the top with gold ink and adding them to the back of the snowman to create her warm hearted snow angel.

Let The Angels Sing

Our only angel in the holiday fat book came from Jennifer Toussaint.  Her heavenly design consists of a neat crackly background with lots of white feathers, beaded trim, crystals and comes with it’s own set of musical instruments.

Jennifer Toussaint 2

Sunday, December 20, 2009

Another Marvelous Mitten

Lynn Lake created a fuzzy blue mitten with felt cuff adorned with chilly snowflakes and a warm cup of cocoa.  “Tis the Season” don’t cha know!

Lynn Lake 1

Monday, November 30, 2009

Operation Organized!

Designer Dee Moran has created a fun and functional shopping planner that will help keep you organized and stylish while you’re out trying to conquer the task of acquiring all of those Christmas gifts and goodies.

pic 1With a notepad for making lists, and a filing system for coupons or receipts as well as a matching micro bead embellished pen you will be all set to hit the mall and get what you need for everyone on your shopping list.

Supplies needed to make one for yourself:

Elastic: 1/4” x 8” (1 piece)

Chipboard: 5.5” x 3.5”(2 pieces), 5.5” x 1” (1 piece)

Paper pad 5.5” x 3” (1 piece)

Patterned paper: 6” x 9.5” (1 piece)

Coordinating  paper 2” x 8” (1 piece)

Coordinating Papers 6.5” x 4” (1 piece) and 8” x 5.25”(1 piece)

Plain colored card stock 6”x 6” (6 pieces)

O’So Sticky Tape 1/8” size

Sharpie marker – color to match the paper

How to do it:

Step 1.  Create the cover:  Glue the chipboard pieces as shown below on to the back of the 6” x 9.5” patterned paper leaving a small gap between them.


layout1 jpg

Miter the corners and glue all edges down to the chipboard .

Step 2 Attach the elastic:  Punch 2 holes on backside of organizer 3/4” up and 3/4” in from each corner.  Color the elastic with colored Sharpie to match paper.  Thread elastic through the holes and adhere on the inside with O’So Sticky Tape.  Note:  You need  some slack in the elastic to have enough room to close the book - so don’t make it too tight.

Here is a photo of the back cover to show how the elastic comes through:

Elastic

Step 3 Finish the cover”  Glue the  8” x 5.25” coordinating paper inside the cover to give it a finished look.

Step 4.  Create the pocket:  Cover the 5.5” x 3” chipboard with 6.5” x 4” coordinating paper.  Apply 1/8” O’ So Sticky Tape to the back side of this piece, as close to the edges as possible to the bottom and outer edge of the pocket. Place this inside of the back cover of the organizer (the side with the elastic on it) to create a pocket for the paper pad to slip into.  When you insert the paper pad it looks like this:

pocket

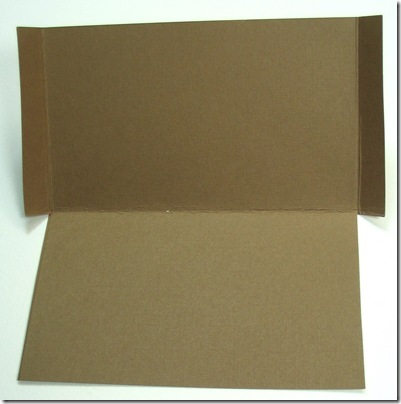
Step 5.  Create the file pockets:  Take one of the 6” x 6” cardstock pieces and score 1/2” on 2 sides then fold the whole piece in half like this:

scorefold

Cut away two edges like this:

cutscore

Glue the remaining edge flaps to the inside to create a folder.  Repeat four more times for a total of five folders (shown below).

Step 6.  Create file tabs: With the remaining 6” x 6” cardstock, punch or cut five tabs.  Fold and adhere to each pocket.  Label as desired.

Step 7.  Create accordion with files:   Adhere double sided tape to the center of each of the four pockets and attach them together to create an accordion.  Cover the top pocket with patterned paper (2” x 8” strip of paper) and embellish as desired.  Glue the accordion to the inside of the front cover with pockets facing out.  Here is how Dee did hers:

accordian from top coupons

Step 8.  Embellish as desired.


Dee created a faux bound edge with cardstock and faux brads leaving a gap to store her pen:
binding

To create the coordinating pen, Dee took a plain round barrel pen and wrapped it with O’So Sticky Tape.  She then covered it with coordinating patterned paper and embellished the top edge with 1/4” O’So Sticky Tape and micro beads.

pen 

While the instructions may seem lenthy, it’s only because we have a way of over explaining everything to make it easy for you!  Got an hour or two of down time this week?  Whip one up and see for yourself, and then send a photo so we can see it too!  Ü